Family
How to Make Stickers With a Cricut for Beginners

When I first got my Cricut Maker, one of the things I was most excited to make were sticker sheets and die-cut stickers. I had all these ideas in my head—custom labels and stickers for my kids—but I quickly realized I had no idea what I was doing. A Cricut isn’t a printer, so how was I supposed to create colorful stickers and labels? I went down a rabbit hole of Cricut tutorials, trial and error, and troubleshooting. A friend of mine, who is a Cricut pro, helped me get started, but I still had to figure out the settings on my own. I recently shared some stickers that I made for my girls and started getting dozens of messages asking how I made my stickers—what printer I used, what paper worked best, and which settings created that perfect cut. Now that I have it all figured out, I’m excited to share everything I’ve learned.
How to Make Stickers With a Cricut (for Beginners)
Stickers are loved by kids of all ages, and the only thing more fun than a new sticker pack is making your own homemade stickers. If you have a Cricut, you have the perfect sticker maker. Once you get the hang of it, making your own stickers with a Cricut is fun and easy. These stickers are perfect for adding your personal touch to birthday parties, holidays, school supplies, playdates, and even personalized gifts. With the right materials and print settings (ok, and a great printer) you’ll be ready to start your sticker-making journey, without all the stress or feeling lost, since I figured out an easy way to make DIY stickers with the Cricut. Here’s my complete guide to making stickers with a Cricut.
The First Time I Tried Making Stickers (What Went Wrong and What I Learned)
The first time I attempted to make a sticker sheet, my Cricut machine cut all the way through the sticker papers. I tried adjusting the material settings, but no matter what I did, it wasn’t working. The Cricut sticker paper was not my favorite, and the entire process was more frustrating than I thought it would be. It felt like a huge learning curve since I had no idea what I was doing, and I almost gave up.
Finding the best sticker paper and settings was key. I had to buy a new inkjet printer and ended up testing at least six different types of sticker paper before I found the one—the perfect material that worked for everything. It’s waterproof, making it great for water bottles, chore charts, calendars, and journals. But it’s also perfect for my kids to use on paper since it peels off easily.
Once I had the right paper, I focused on getting the cut settings right. I experimented with different settings in Cricut Design Space and finally found the perfect combination for kiss-cut stickers (where the stickers stay on the sheet) and die-cut stickers (where they are fully cut out). Now, making stickers is second nature, and my kids love choosing their own designs. It’s become a fun activity we do together, especially on rainy days or when we’re stuck inside during the winter. There are lots of unique ways to make stickers your own, from adding favorite animals and objects, to personalized stickers with your name on them. My desk has turned into a sticker shop, and my kids absolutely love it.
Why I Use the “Create Sticker” Feature
When I first started looking into sticker-making tutorials, I noticed that there are actually different ways to make stickers. The tutorials I found use the offset feature, turning each image into a basic cut, and then using the flatten tool to make everything a single layer. The offset tool works, but I personally prefer using the Create Sticker feature in Cricut Design Space.
The Create Sticker feature makes the whole process easier by automatically setting up your design for a kiss-cut or die-cut sticker. I honestly don’t understand why more people don’t take advantage of this built-in tool—it’s a total game-changer!
Here’s Everything You Need
If you want to create Cricut stickers, you’ll need the right tools and settings for the best results.
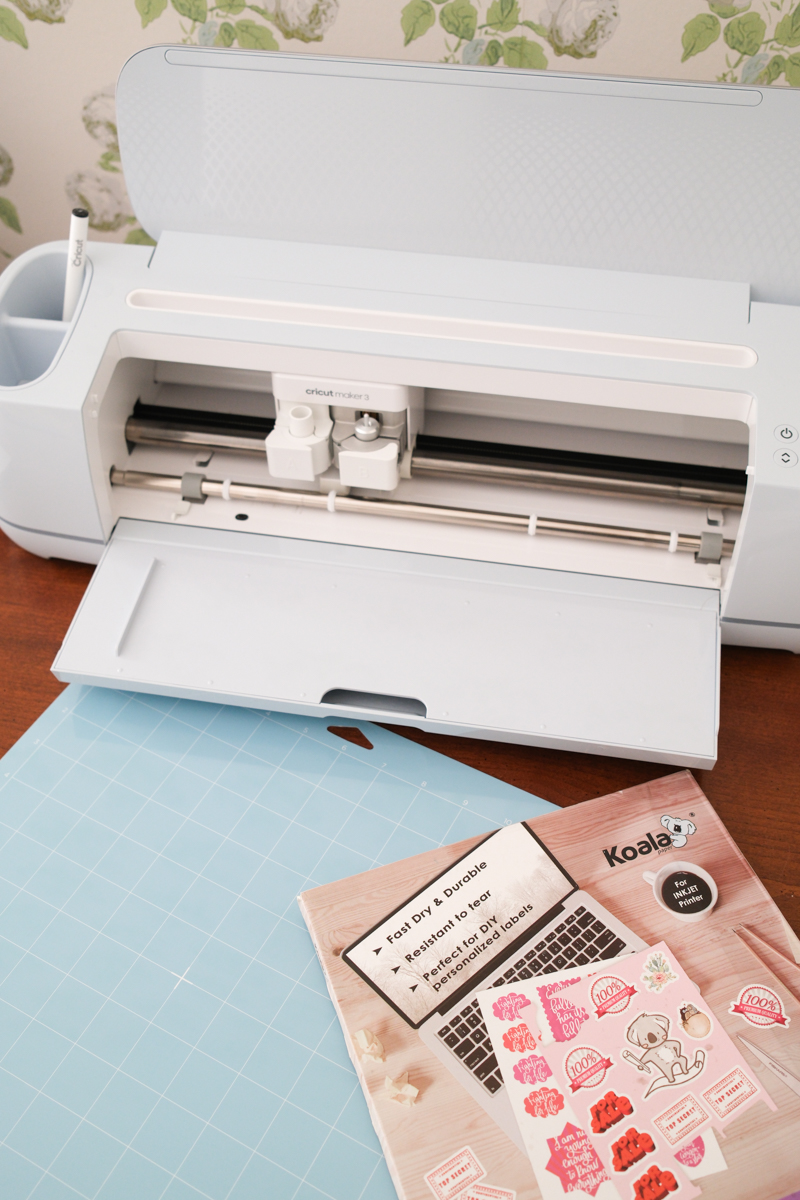
Cricut Machine. I have the Maker 3 but you can use the Cricut Explore Air, or Cricut Xtra Joy
Light Grip Mat (blue) for sticker paper – this will feed your sticker paper into your Cricut machine, and is light, so you’ll be able to peel it off easily without it getting stuck or tearing.
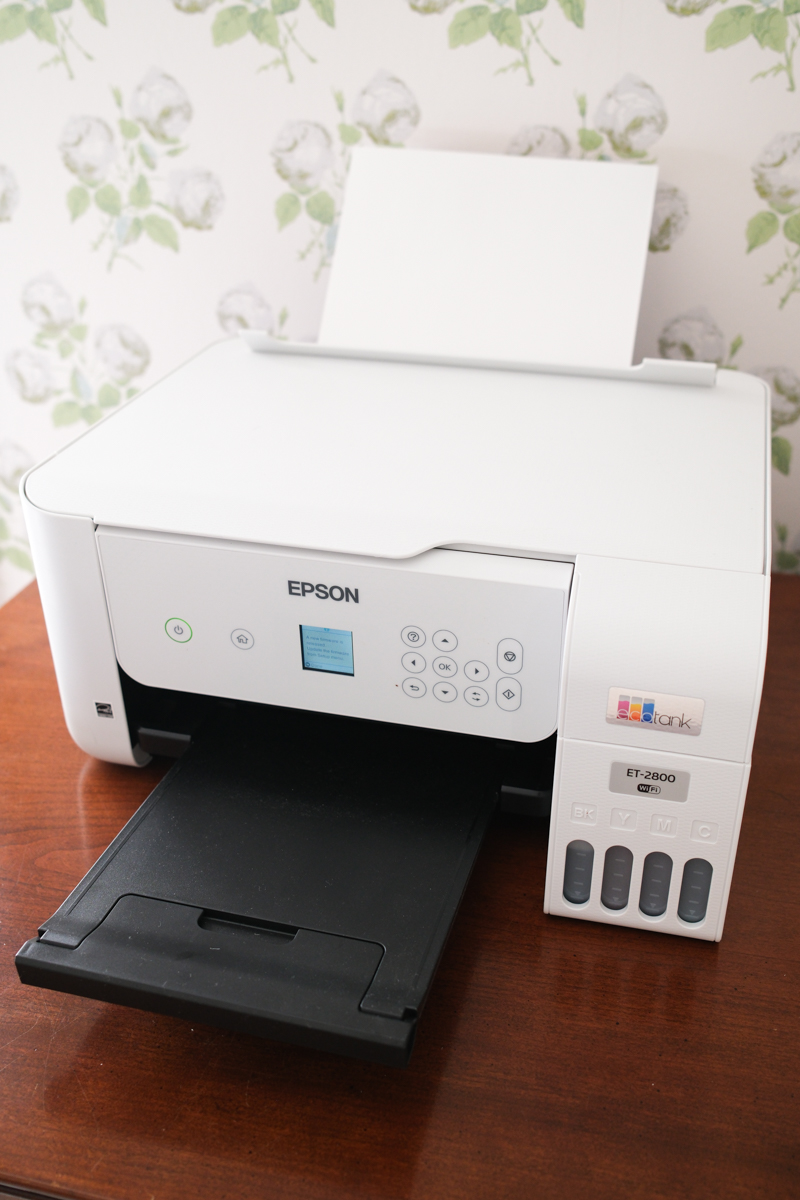
Printer – You can’t make colorful stickers without an inkjet printer.I liked our old printer, but inkjet printers often have cartridges that run out quickly. My friend recommended this cartridge-free printer. It’s eco-friendly, and the ink takes forever to run out! I have printed tons of stickers, and still haven’t had to refill it. I cannot recommend it enough.
Printable Sticker Paper – The type of sticker paper you use makes a huge difference.
And of course, a flat surface to work out.
Important note for Cricut Joy owners – the Joy does not have a print-then-cut feature, so you can make vinyl stickers, but cannot use it to make sticker sheets.
Calibrate Your Cricut for Print Then
The first step is to calibrate your Cricut for for print then cut stickers so it accurately cuts around your sticker designs. You’ll only need to do this once, and it’s an important step.
1. Open Cricut Design Space
Launch the software on your computer.
Click on the menu (☰) in the top left corner and select Calibration.
2. Select “Print Then Cut” Calibration
Choose Print Then Cut from the calibration options.
3. Print the Calibration Sheet
Cricut will prompt you to print a test calibration sheet with a series of lines and a box.
Use your home printer to print the sheet on white paper.
4. Place the Calibration Sheet on Your Mat
Position the printed sheet on a LightGrip (blue) mat, aligning it with the top-left corner.
Load the mat into your Cricut machine.
5. Scan and Cut the Calibration Sheet
The Cricut will read the printed marks and attempt to cut around the box in the center.
6. Check the Cut Alignment
After cutting, check if the cut aligns with the printed box.
If it’s off, Design Space will ask you to select which numbered line is the most accurate.
7. Adjust and Confirm Calibration
Select the best-aligned cut from the options in Design Space.
Your Cricut may ask you to repeat the process until the cuts are precise.
Create Your Sticker Sheet Background
Now that your Cricut is calibrated, it’s time to design your sticker sheet. The entire process might seem complicated. It took a minute to get used to it, but is now second nature.
1. Start with a background
In a new canvas, select shapes (far left) and add a square to the canvas.
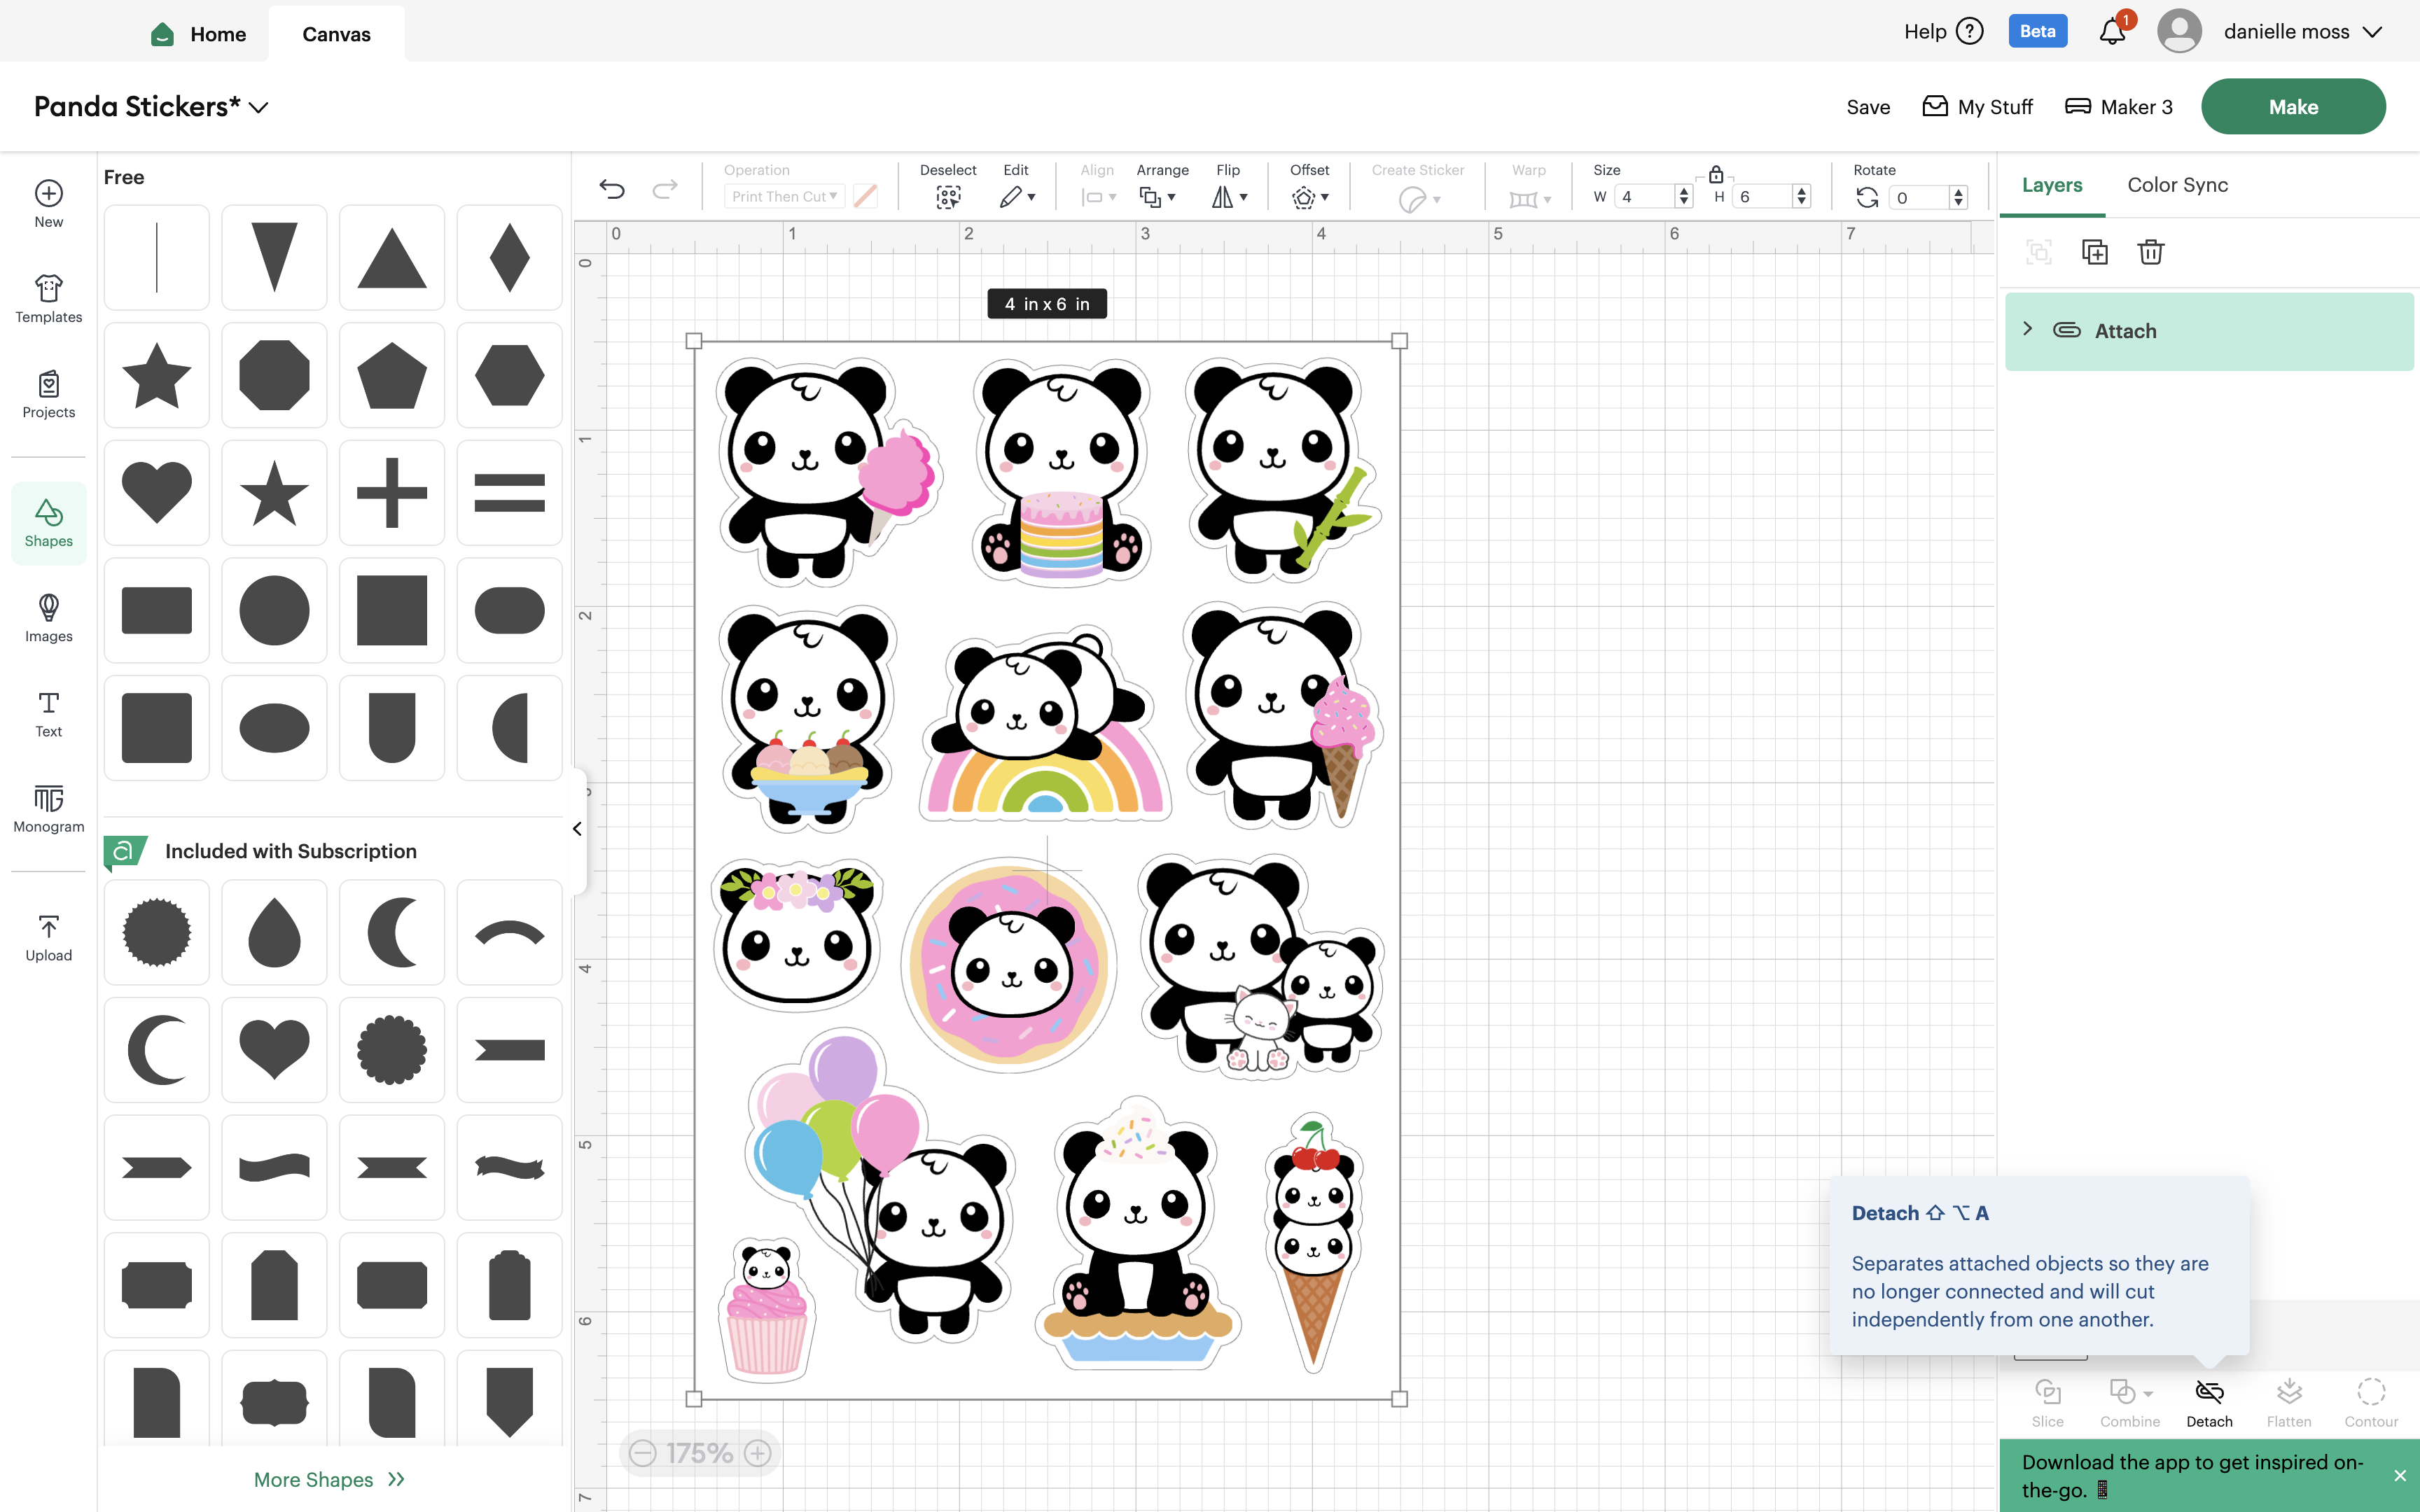
Select lock proportions, which looks like a padlock at the top, and change the size to 4×6 inches or whatever size you prefer. 4×6 inches is a great size for sticker sheets, and I like that I can print two sheets on one sheet of sticker paper.
Make the background the color of your choice. I always make a simple white background.
Click on the rectangle, then create sticker, die cut (no border), and apply. A die cut sticker will cut all the way through the paper, so selecting die cut will cut through the sheet, making your sticker sheet a clean cut. You will select a different option for the stickers on your actual sheet.

Add Images To Your Sticker Sheet
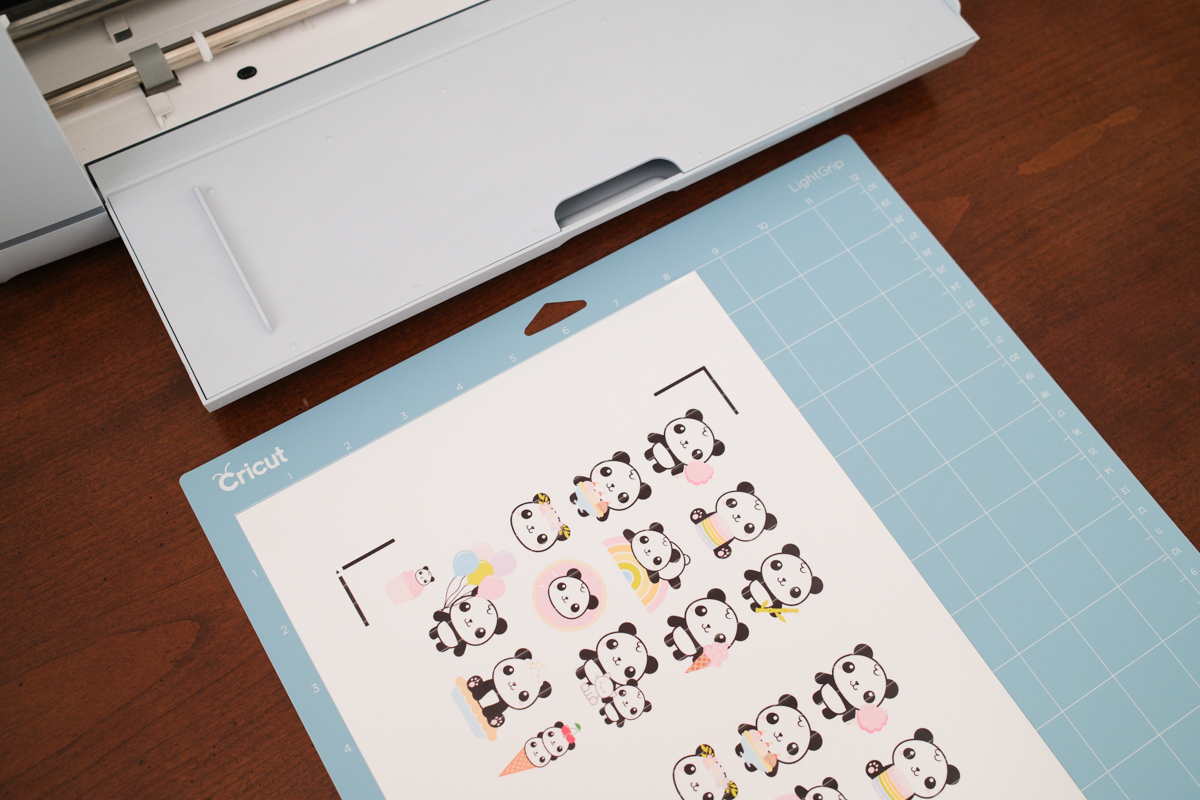
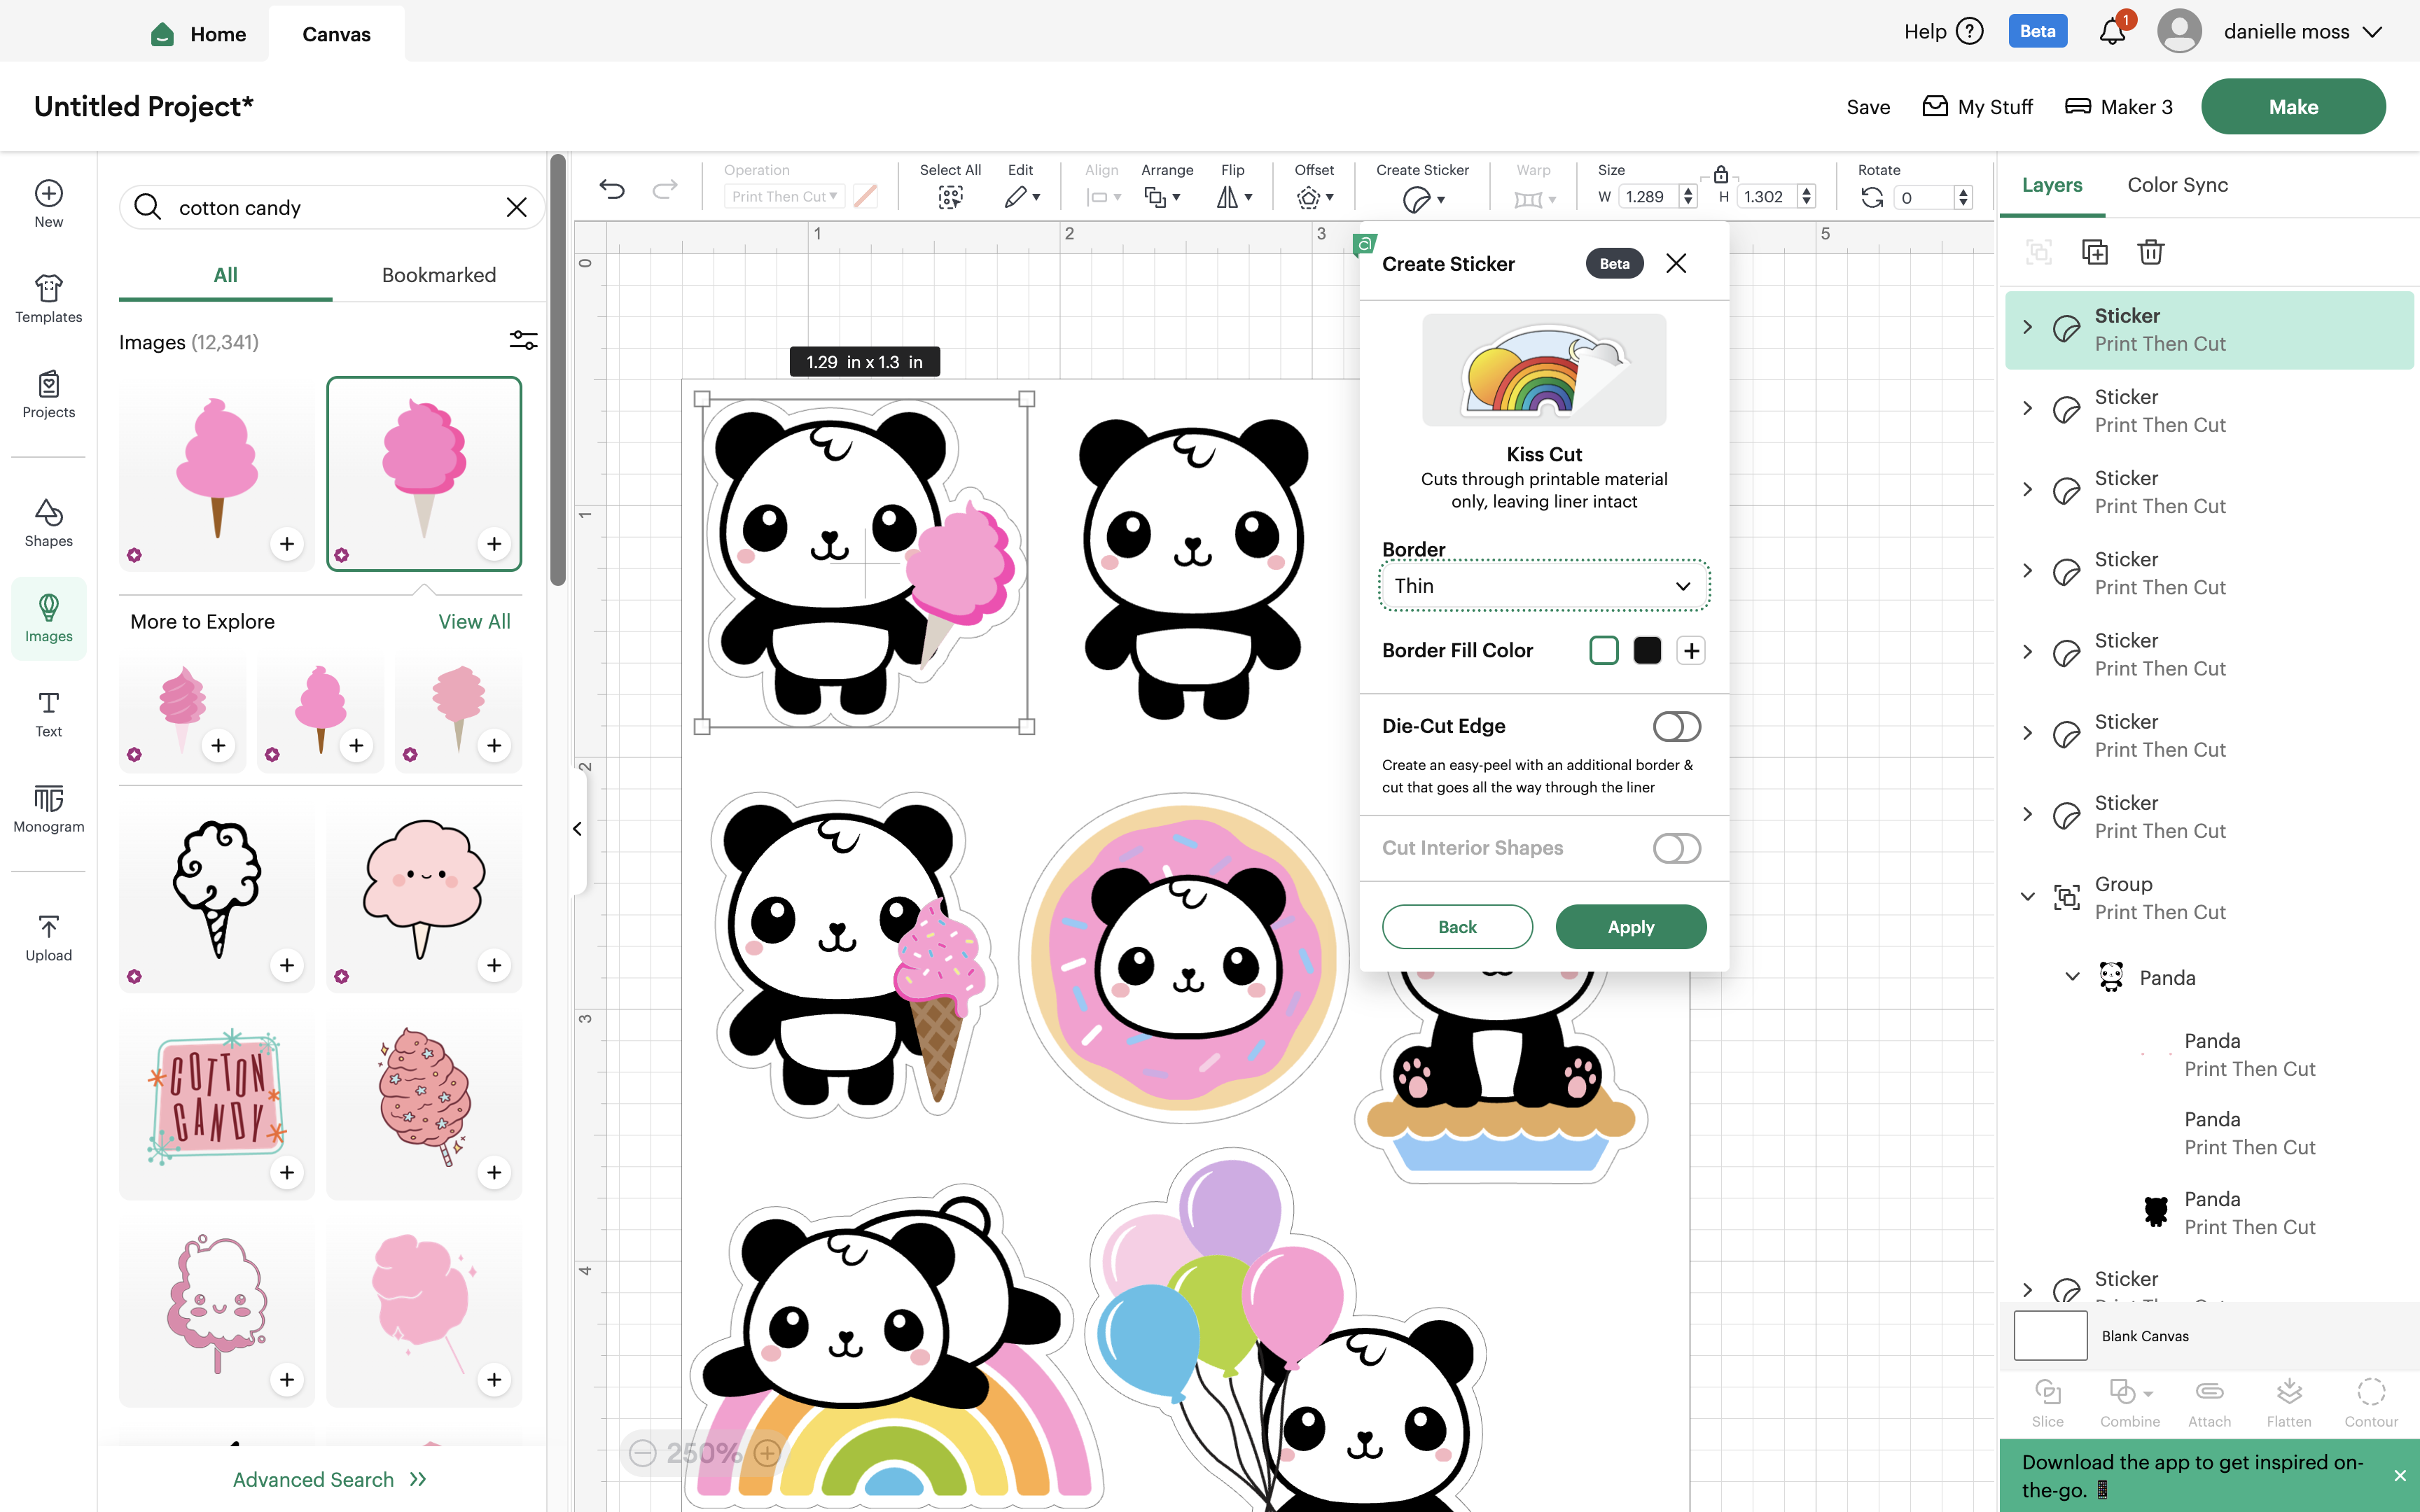
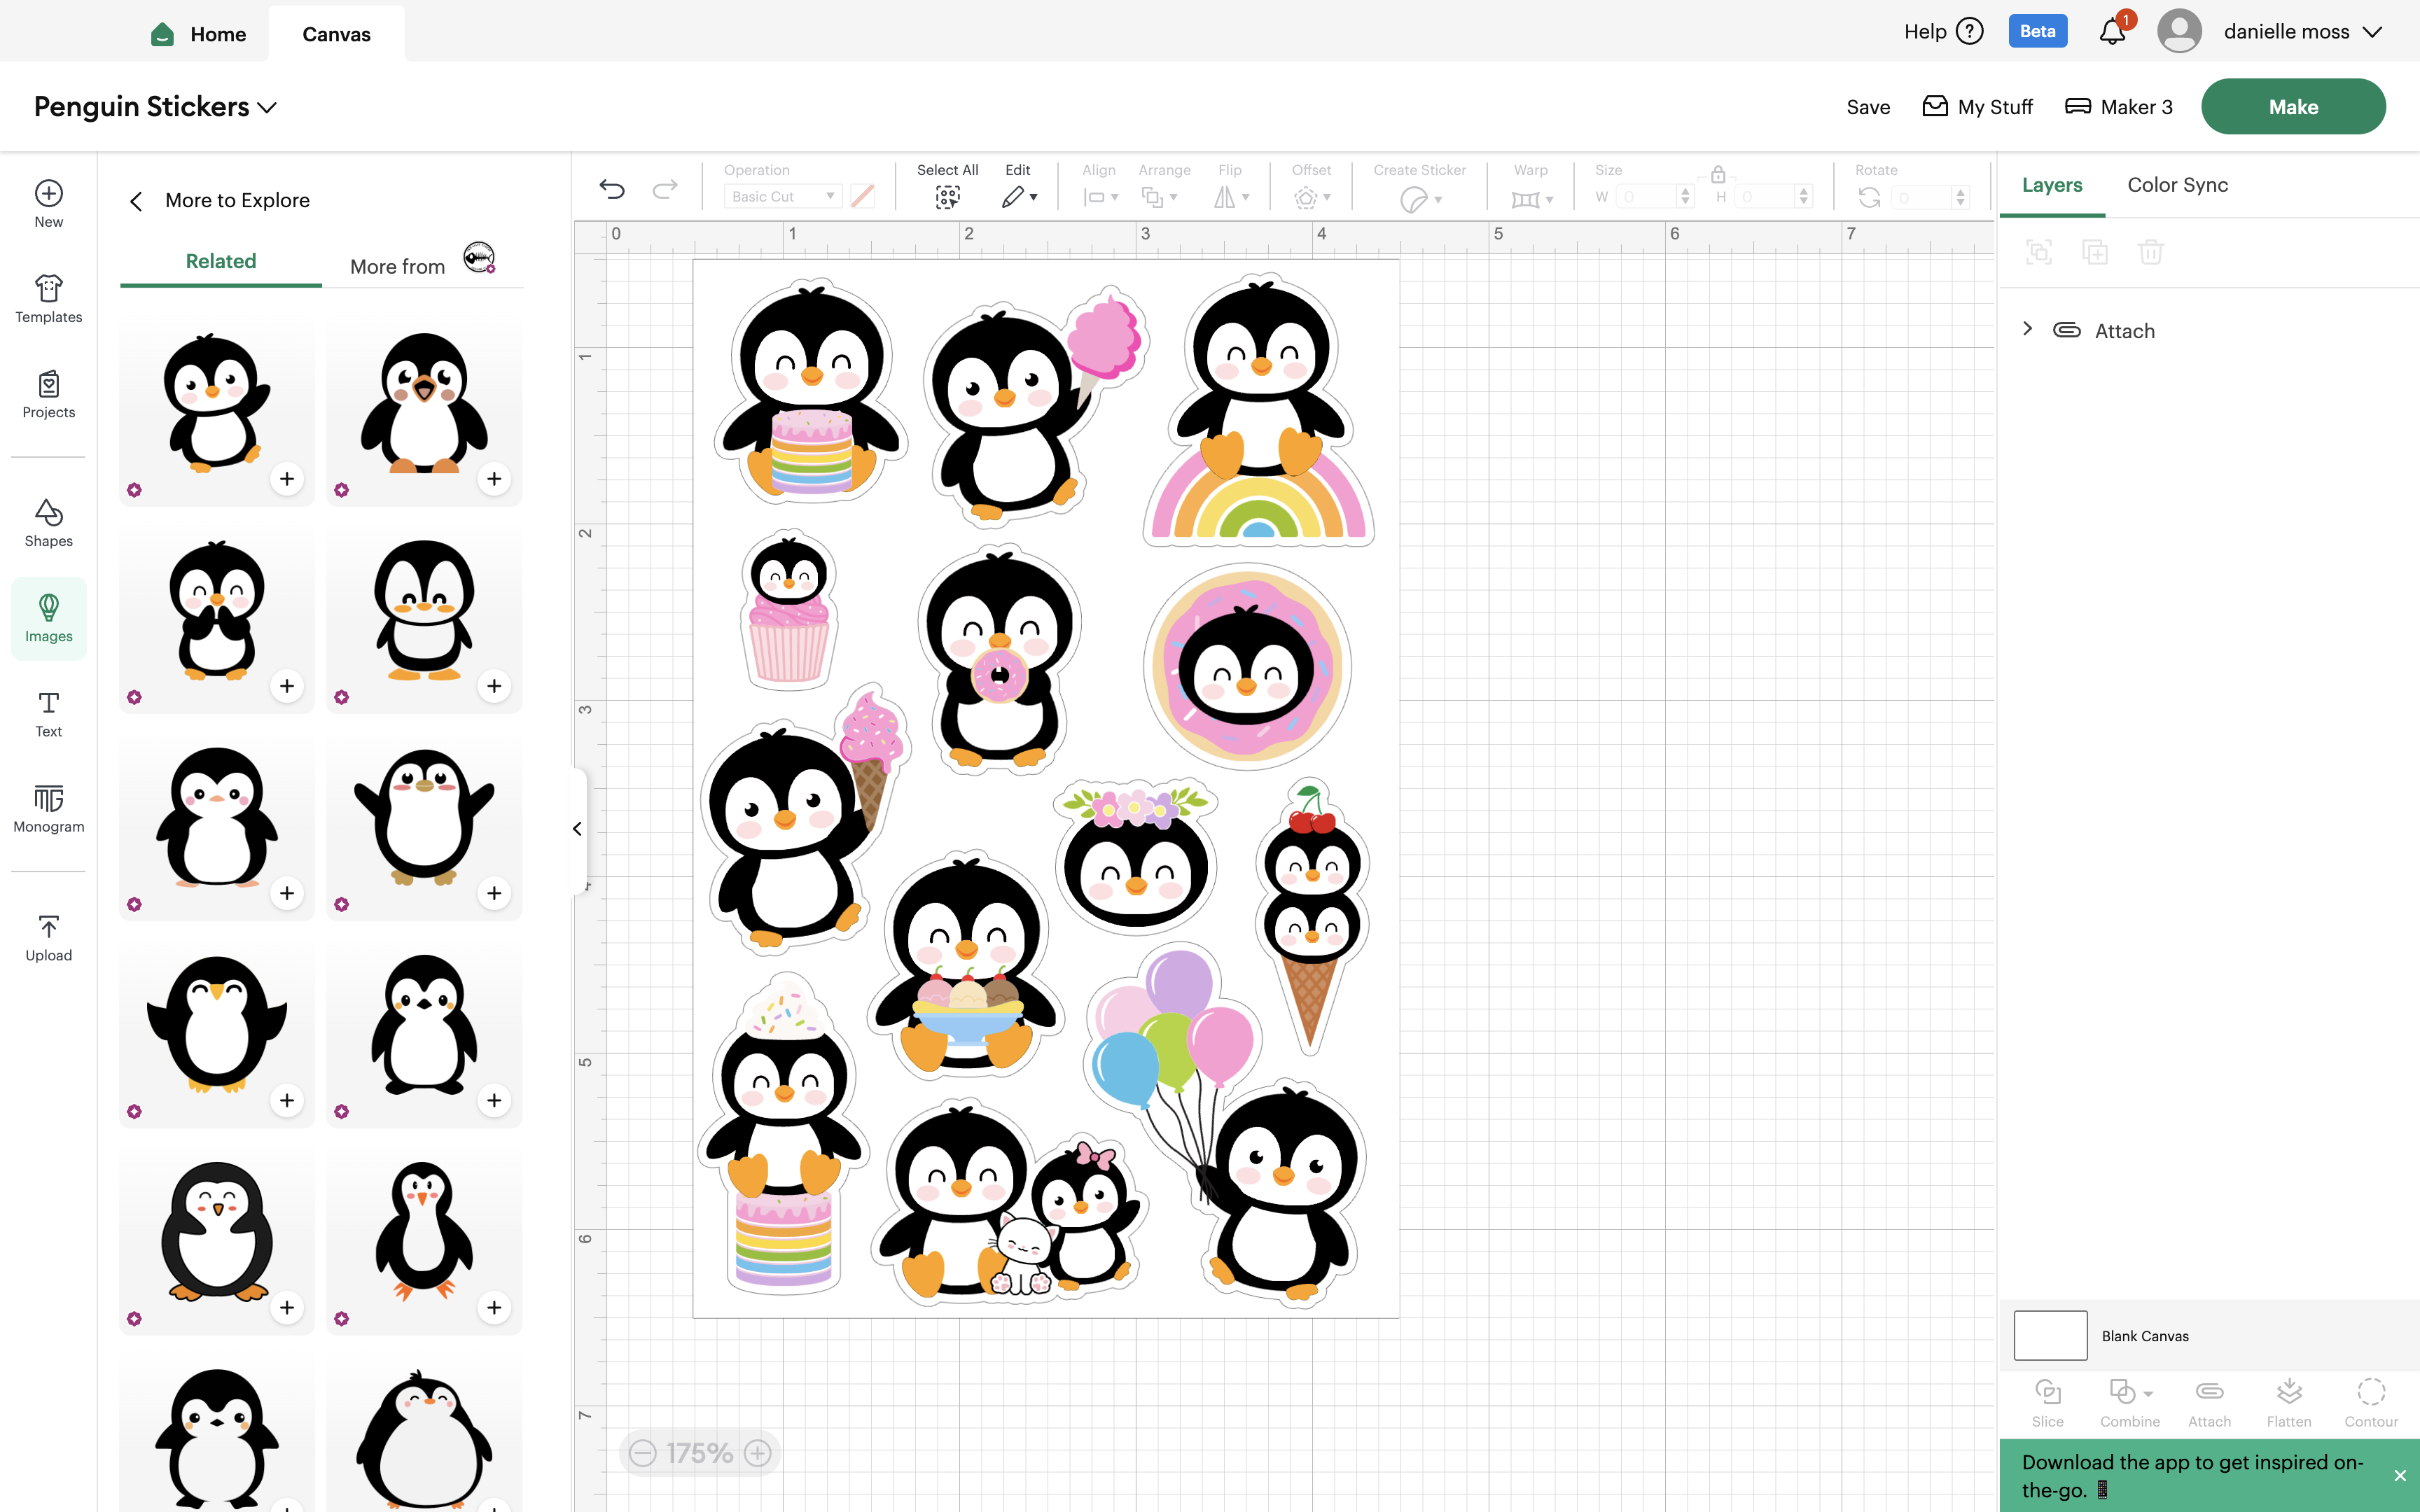
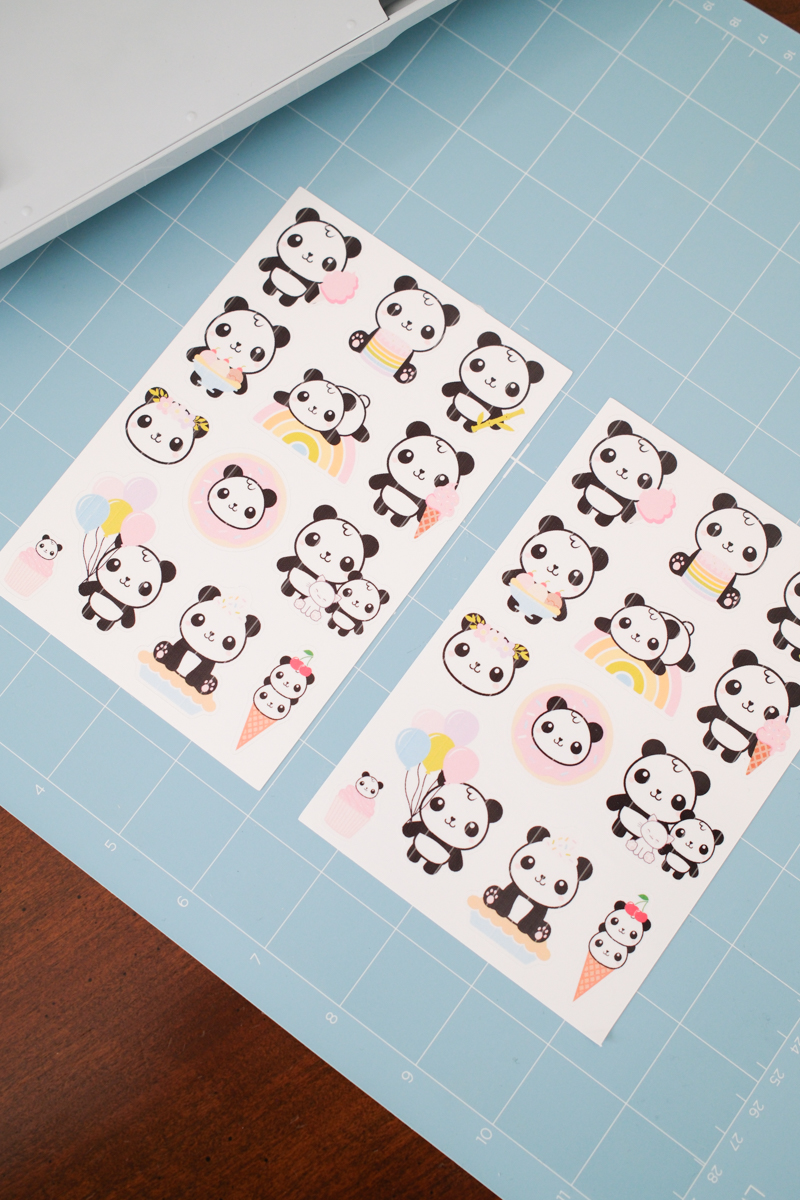
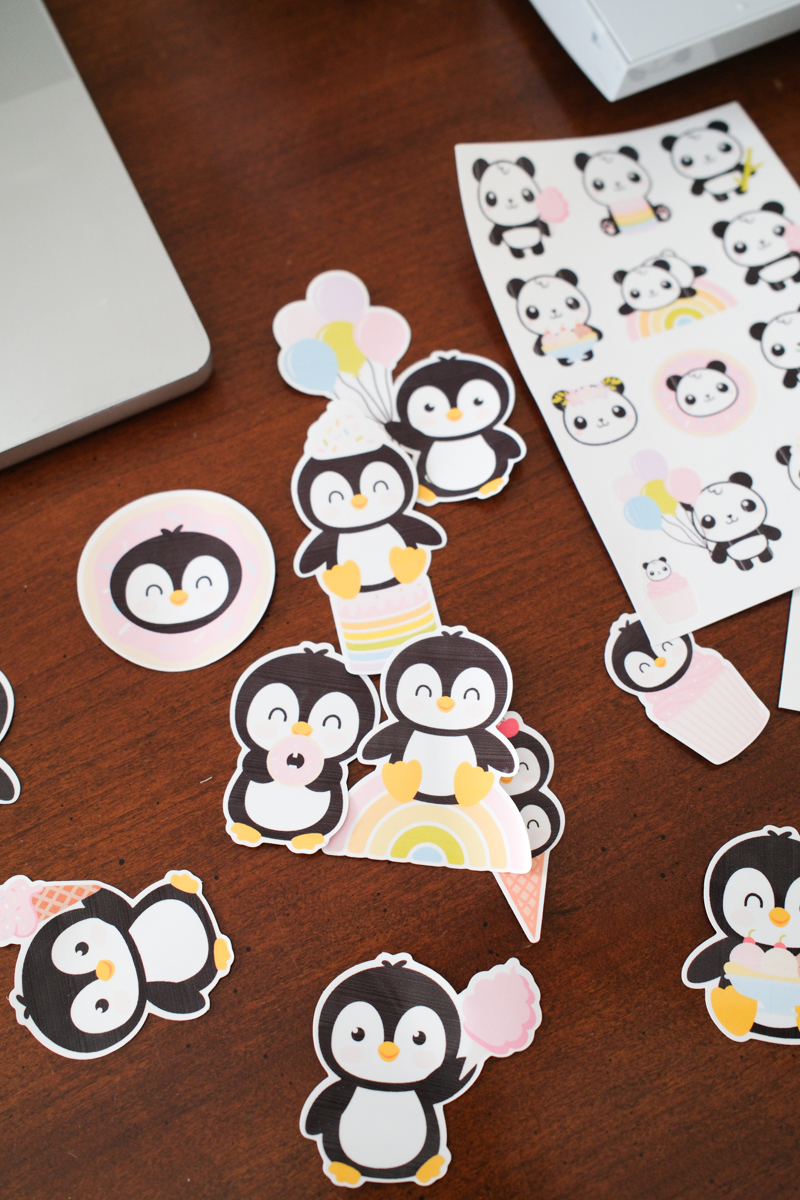
1. Choose an image from the design space library, or upload your own image. There are thousands of images to choose from, and you can search for pretty much everything. Upload images into your canvas my clicking (+). Add all your stickers to the sheet, leaving a little room between each one. I started by searching “Kawaii Pandas” since my daughter loves pandas, and often requests panda sticker sheets. You can get the exact look of my sticker sheets with Design Space since all the images are included with a premium membership.
2. You can edit the color of most images, and combine two images to make one sticker, making fun and unique stickers. We make penguins and pandas with all the girls’ favorite things – so I’ll search everything from balloons and rainbows to donuts and pie.
3. Resize each sticker. I usually keep stickers at around an inch or a little larger, but it really depends on what you’re making. If you’d like to put two images together, just place them where you’d like them, highlight the layers of each sticker by pressing command GYou will do this again when you’re done.


How to Make Stickers With a Cricut
Turn Images into Stickers
1. Once your images are all in place, click create sticker and then kiss cut. Kiss cut stickers attach to a sticker sheet. keeping it attached to the sheet, which is what is needed for die cut stickers. I like to add a thin border, which creates a white outline around the sticker. You do not have to add a white border – this is a personal preference.
2. Highlight all of the layers or select them by clicking and dragging your mouse across the sheet. Group the layers and then select attach.
Creating Die Cut Stickers
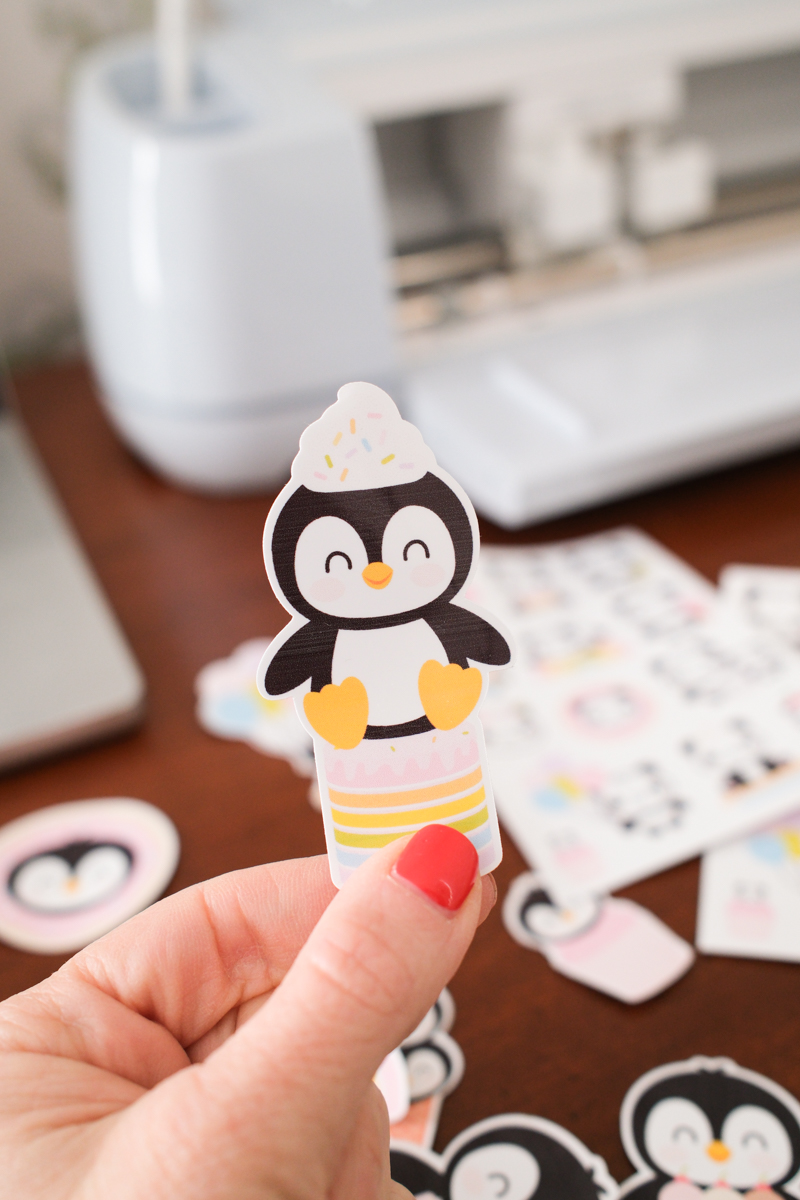
Die-cut stickers are custom-shaped stickers that are cut precisely to the shape of the design, rather than a standard square or rectangle. These professional-looking stickers are ideal for making larger stickers, and are a fun way to dress up water bottles, party favors, folders, and as labels for basically everything.
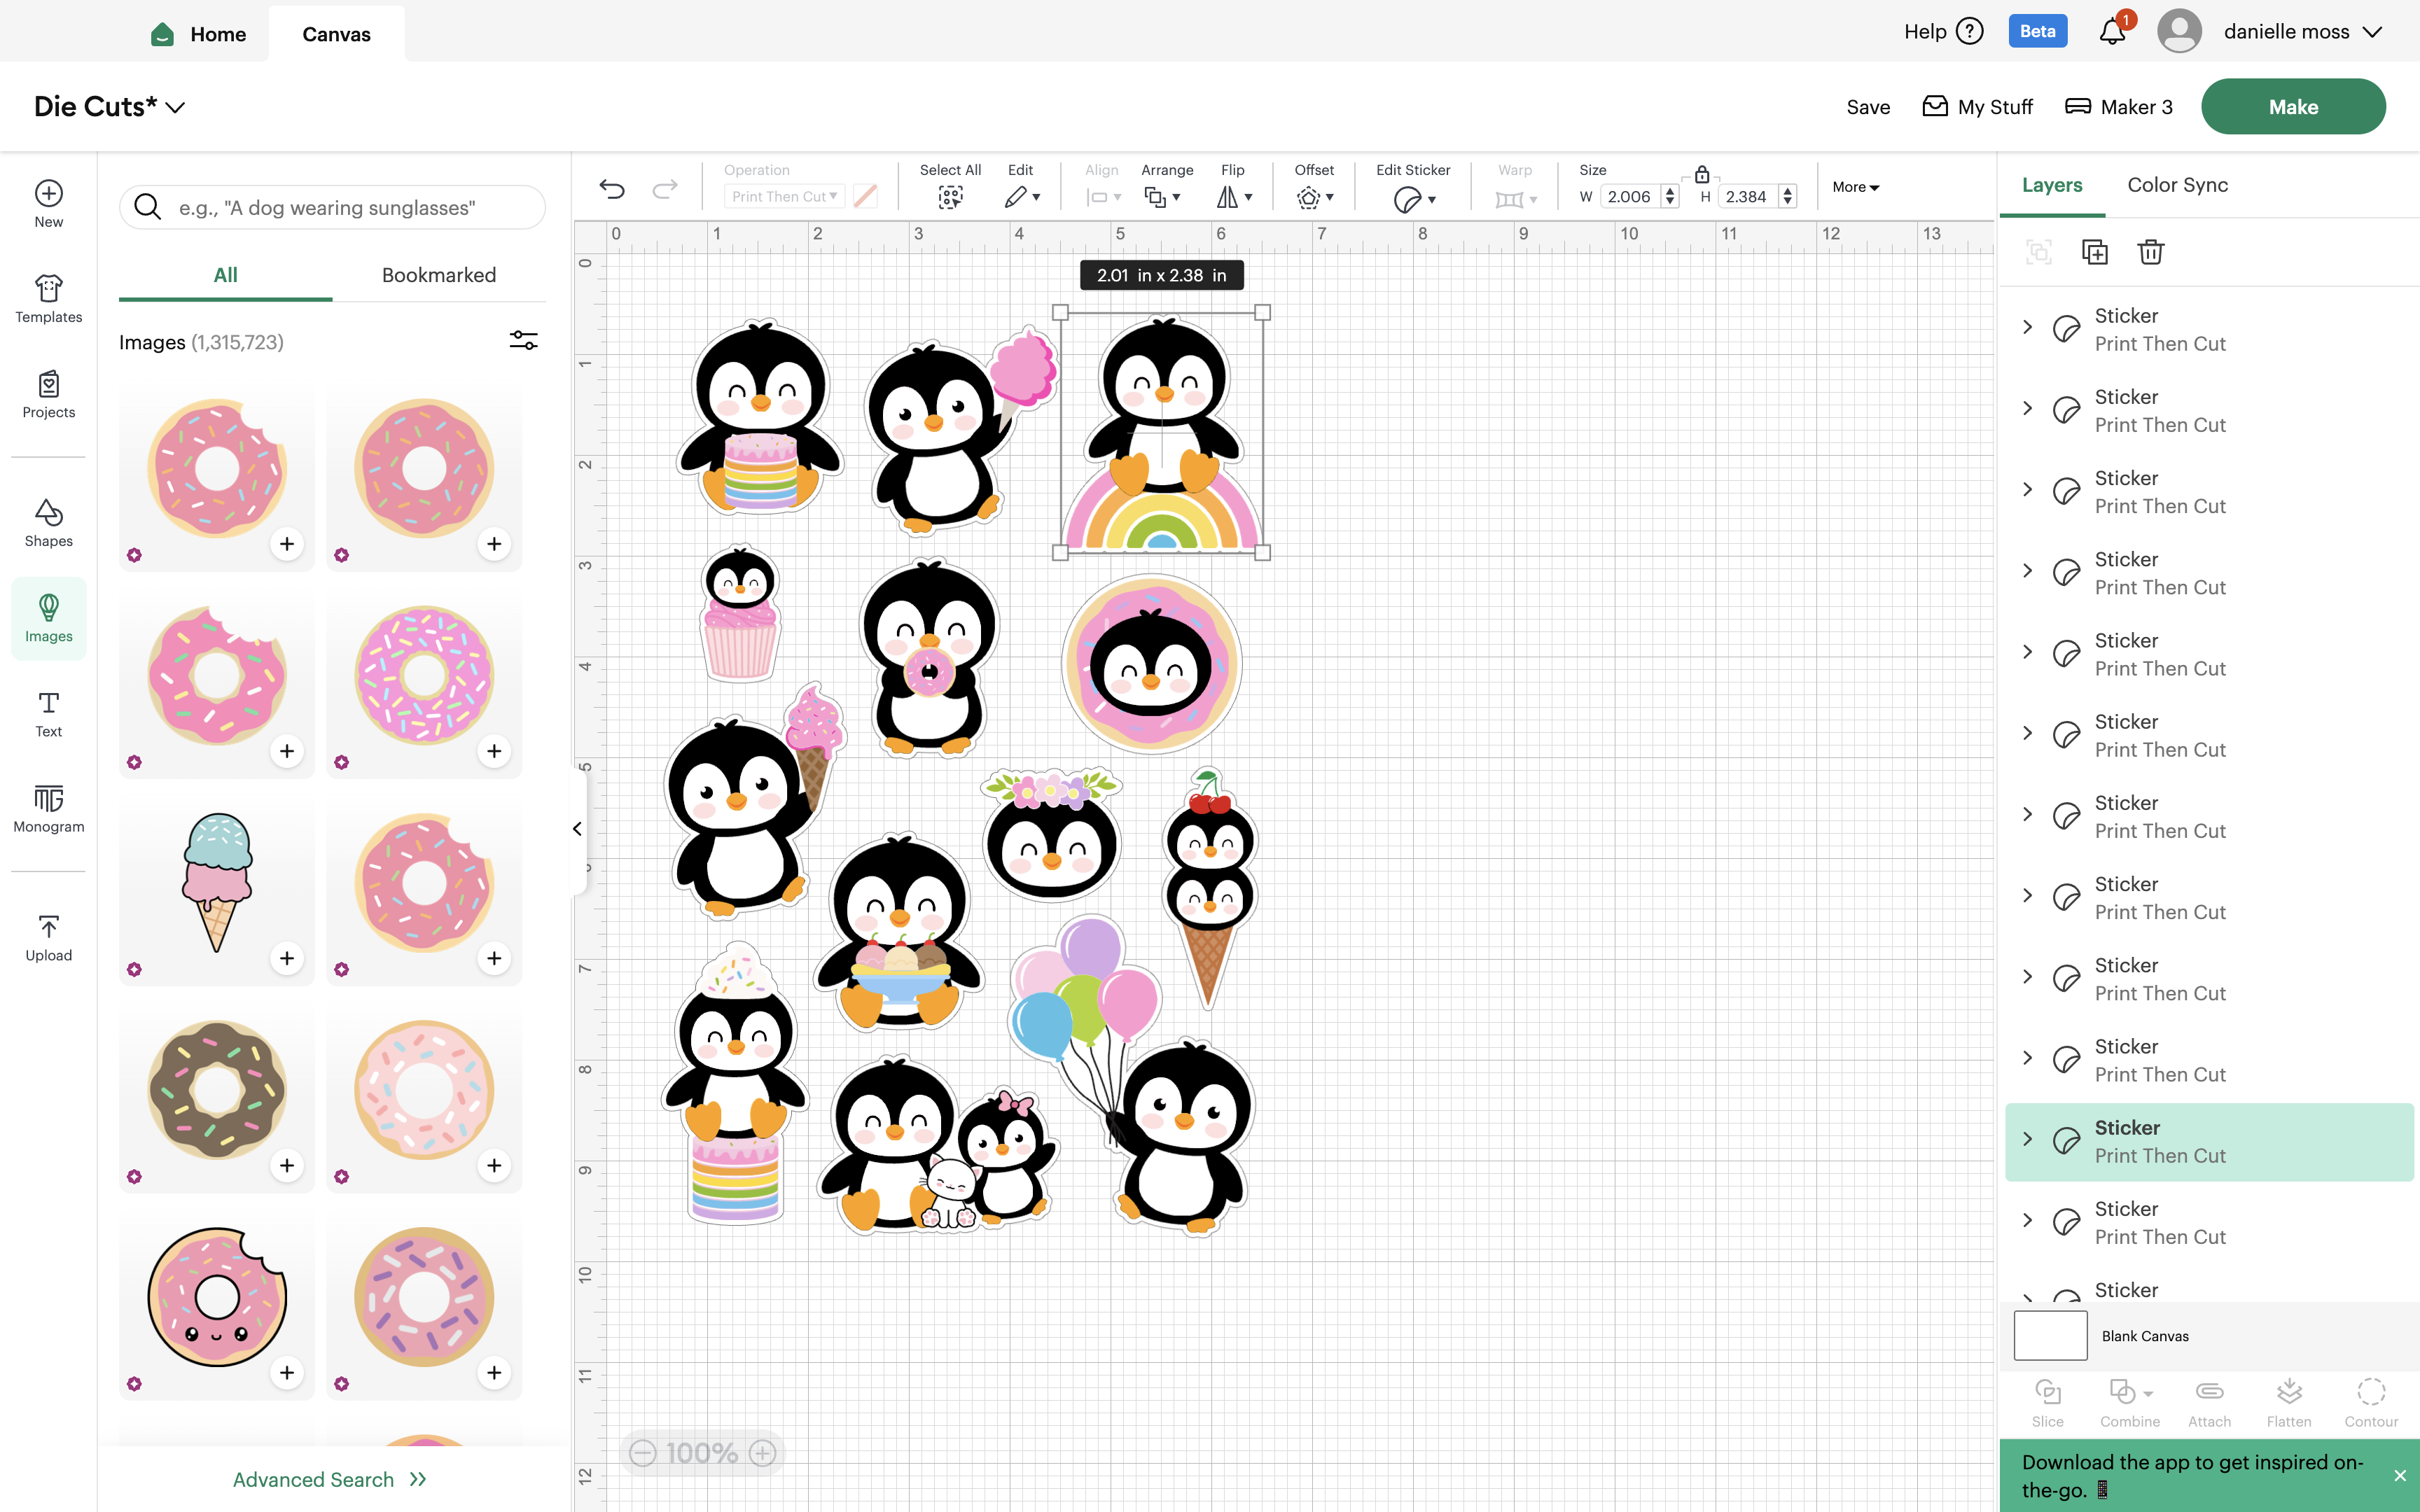
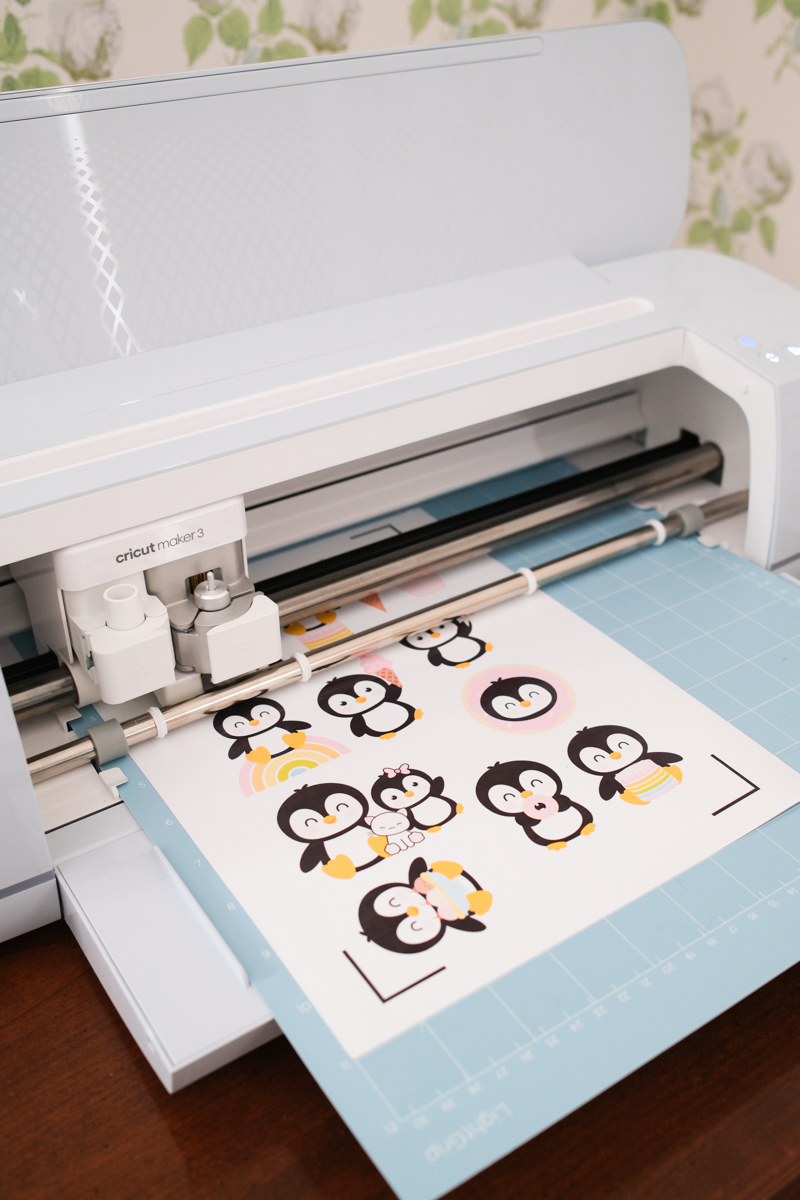
The production process is almost the same, minus a few steps. You’re going to do the same thing you’d do for a kiss-cut sticker, but won’t make a sticker sheet background or attach all the files together. I make my die-cut stickers a bit larger, and use the same sticker paper. You can also use printable vinyl sheets, but this paper is waterproof and works well. So let’s say I’m making some die-cut penguins. You can see they are a bit larger, and there isn’t a background. You won’t attach the stickers to one another since each one is going to be cut out all the way through the paper. Cricut will move everything around to make the most efficient use of space, although I’ve found that isn’t always the case, and you can play with location just like you did when printing two sticker sheets.
1. Add an image to your canvas.
2. Select Create Sticker then Die Cut, and add a border if you’d like one. You can add a thin border, or customize it if you’d like it thicker or thinner.
3. Next, you’ll send the die-cut stickers through your printer, and then follow the same final step of adding the sheet to the lightweight grip mat, and feeding it through the Cricut.

Uploading Your Own Images to Design Space
You can create your own custom stickers in Canva or photoshop, or purchase SVG files on an online marketplace like Creative Market or Etsy. Design Space is Cricut’s program. There’s even an app in the app store, and I’d say it’s easy enough to use. I’ve purchased some of my kids’ favorite characters, from Bluey and Disney princesses to Elphaba and Taylor Swift. You can use a PNG or JPEG but I recommend an SVG or PNG since the backgrounds are transparent, and SVG files can be edited in Design Space.
1. Select the upload button.
2. Select upload image.
3. Drag a file or browse your computer to choose a printable image.
4. Upload the image and select apply and continue.
5. I actually usually select flat graphic since the quality is the best, and I’ve found that I don’t usually want to edit colors.
6. Select upload. The image will then be saved to Design Space and uploaded to your canvas.
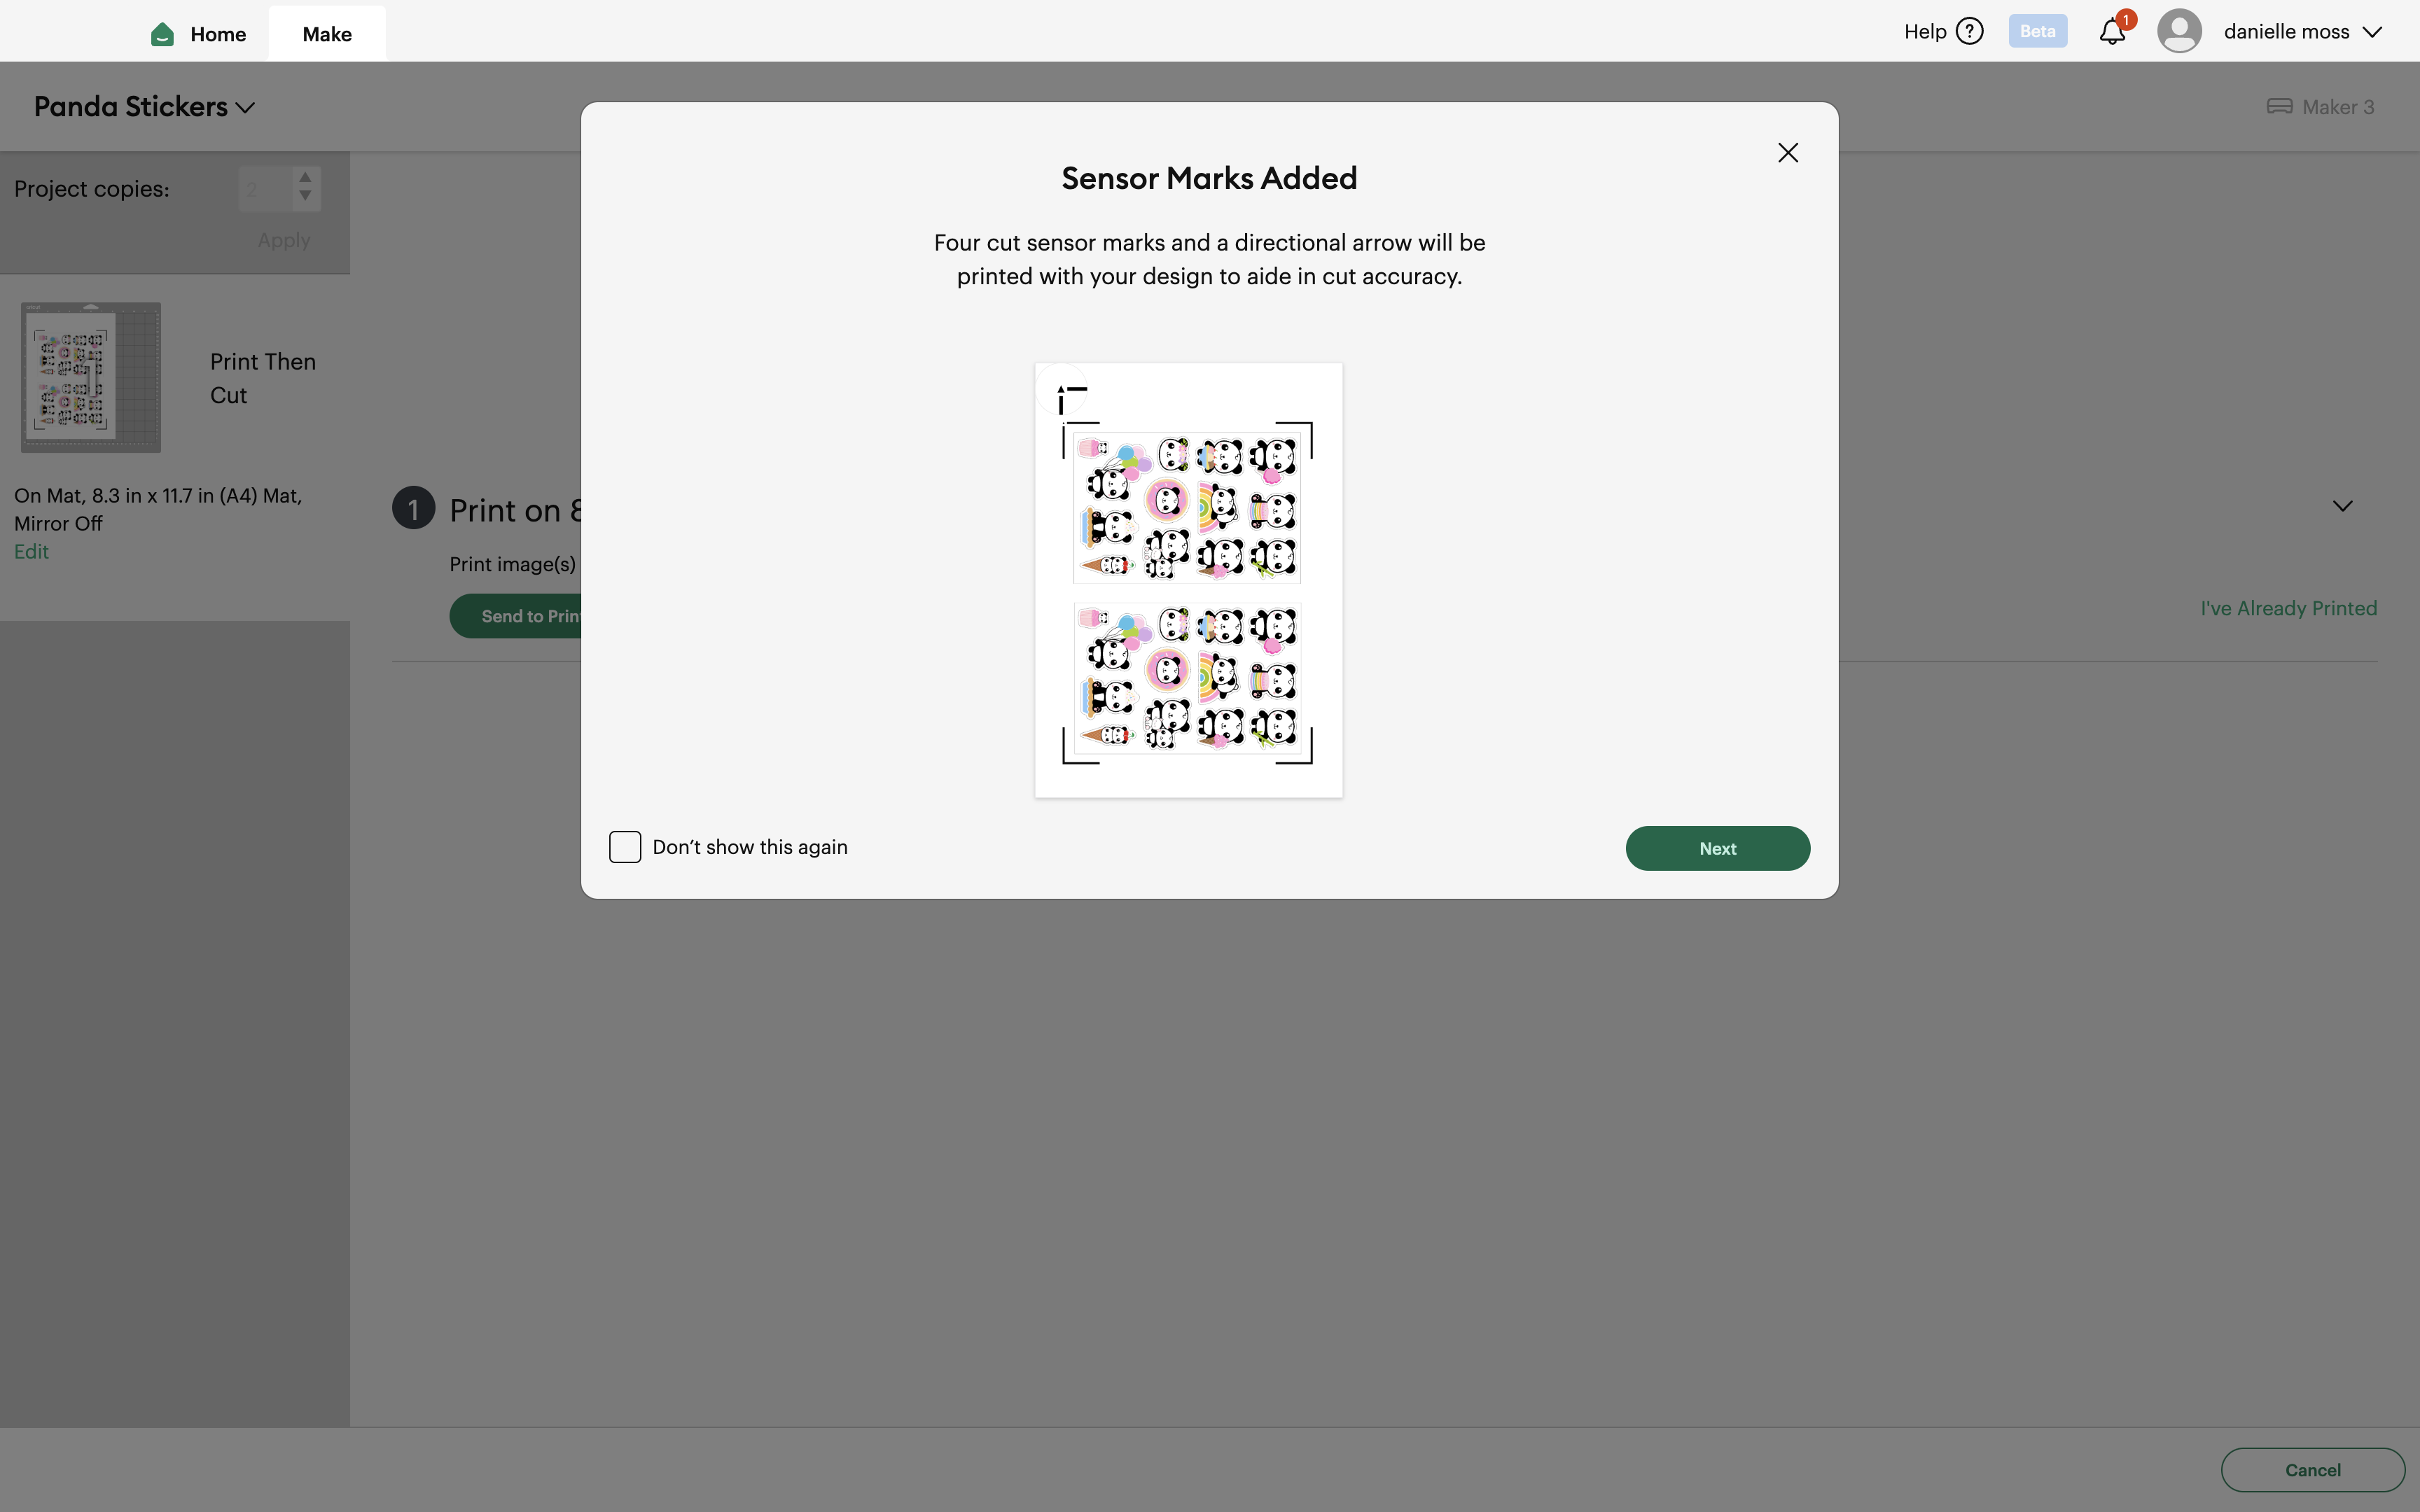
Print Then Cut Your Stickers
1. Select make in Design Space.
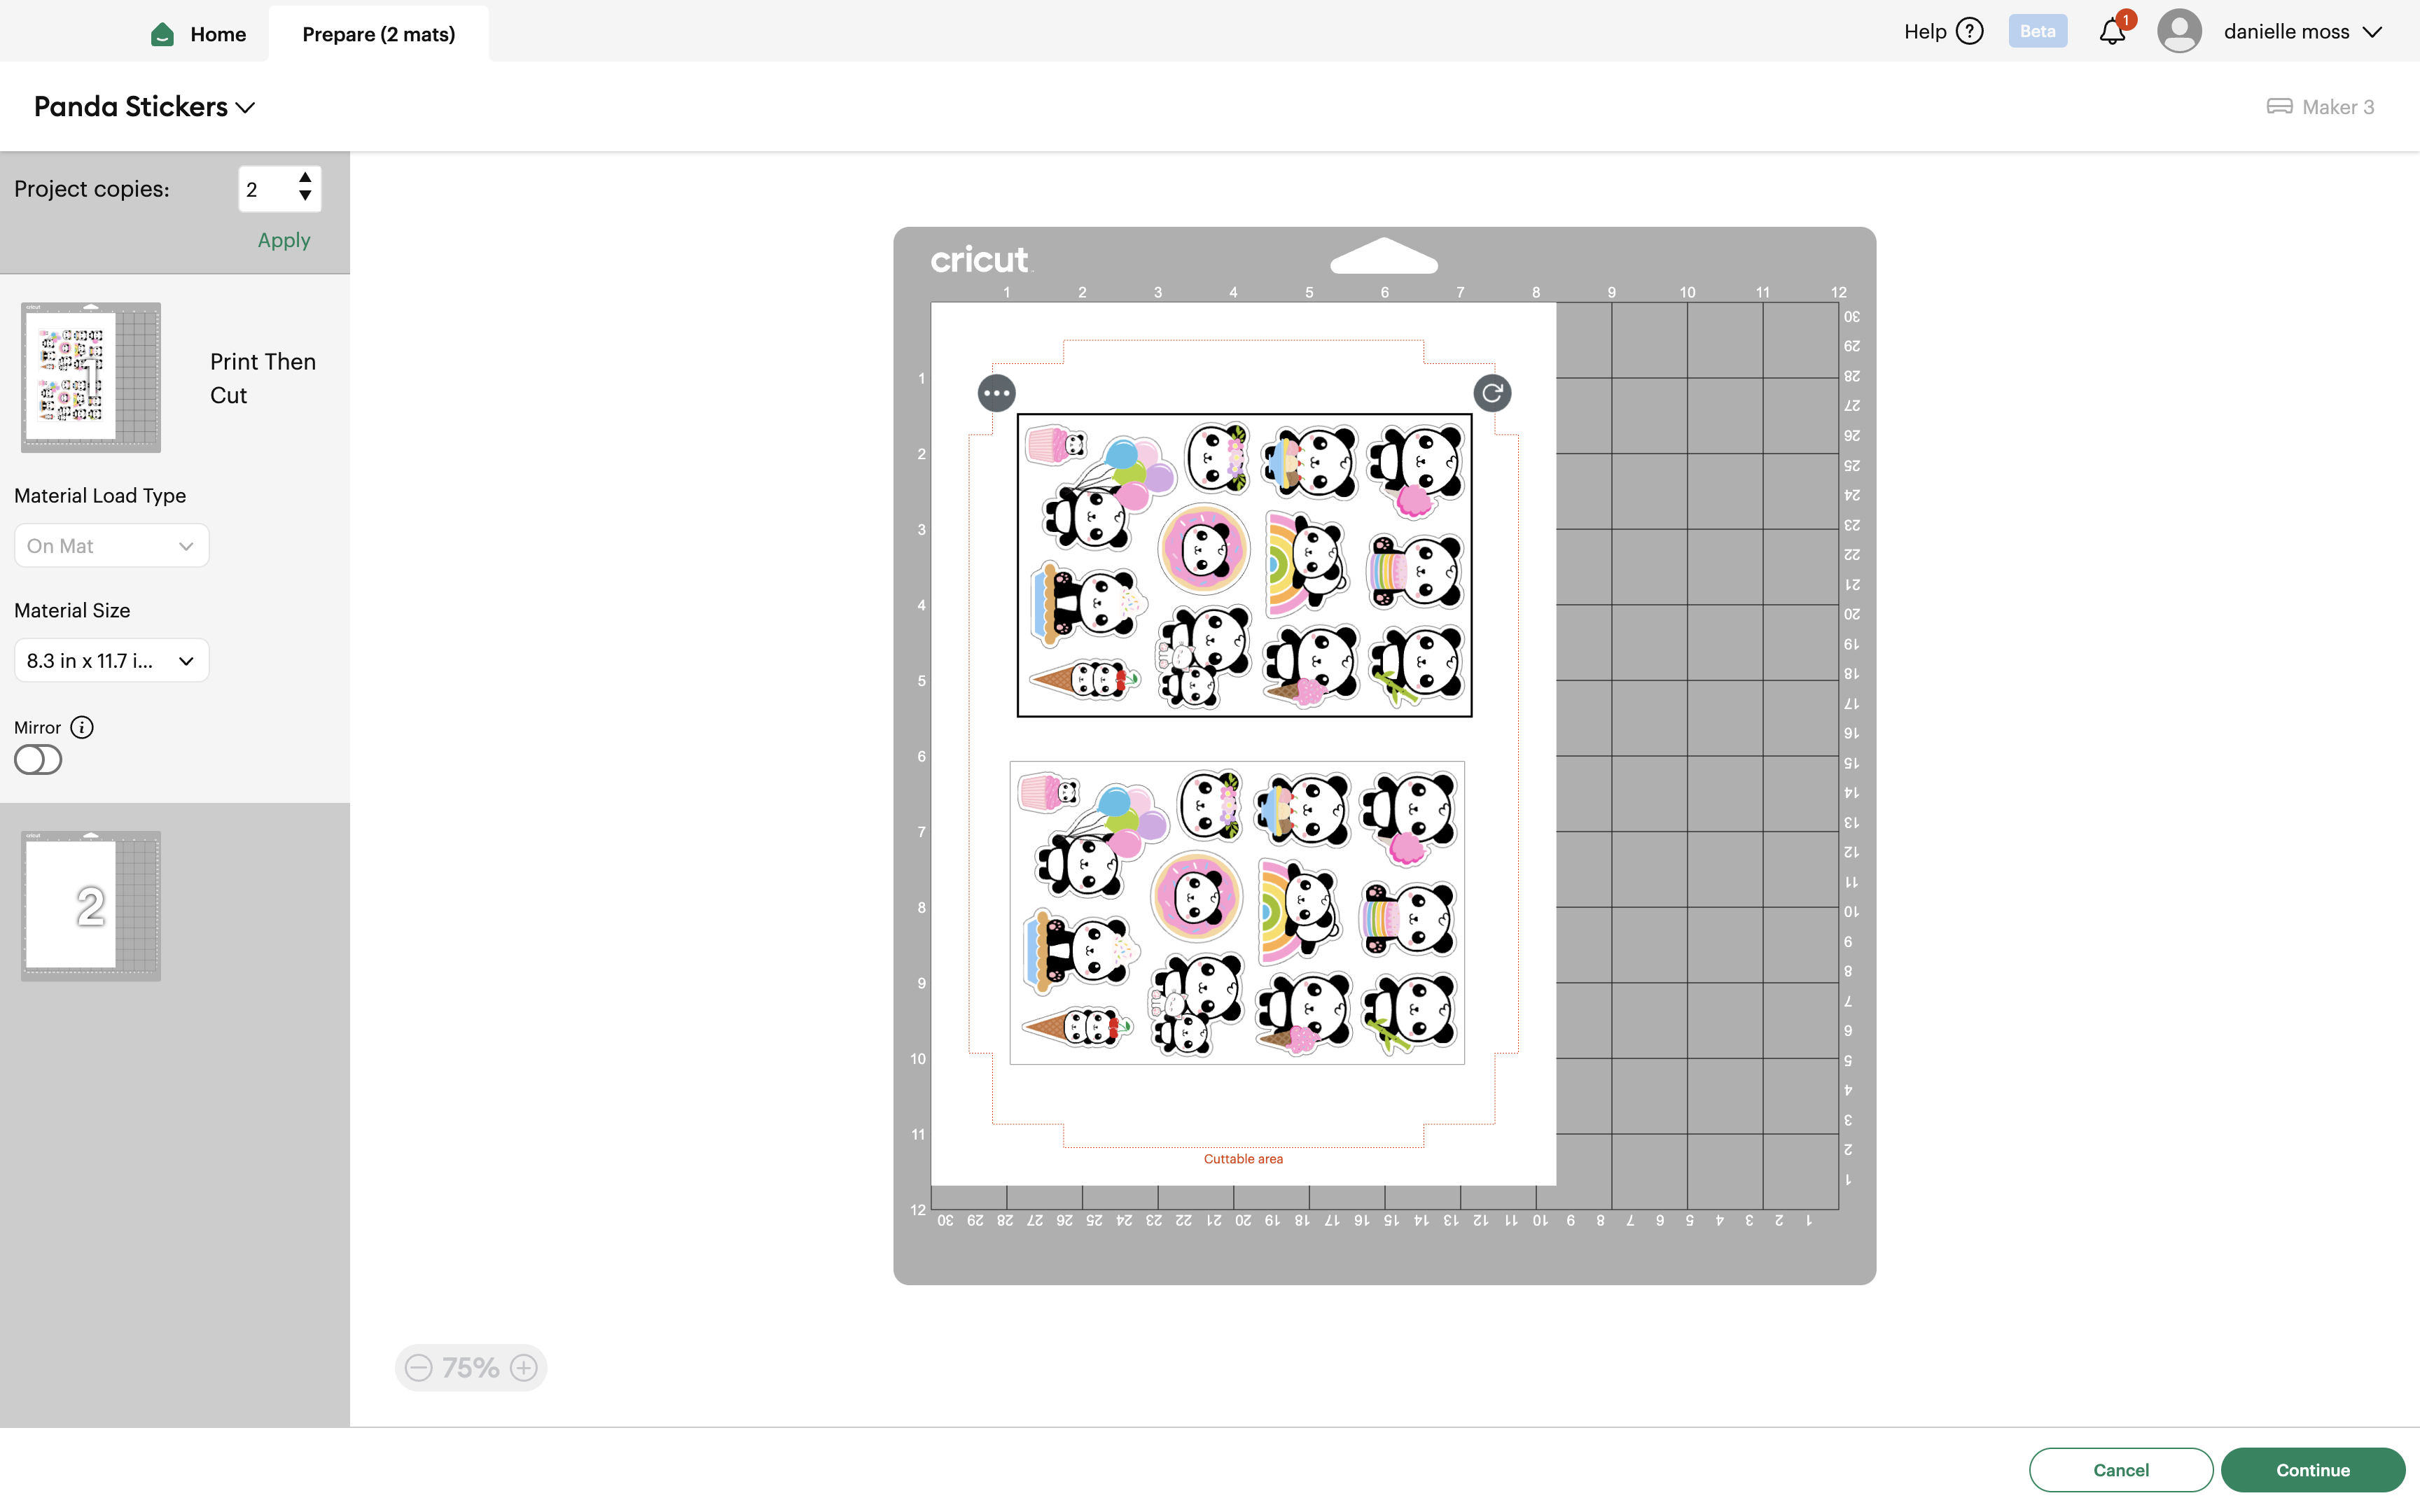
2. Update the number of project copies to 2.
3. On the second copy, click the (…) and move object to the first sheet.
4. Select one of the sheets and then the arrow, and turn it sideways. Do this to both sticker sheets and space them evenly within the cuttable area.
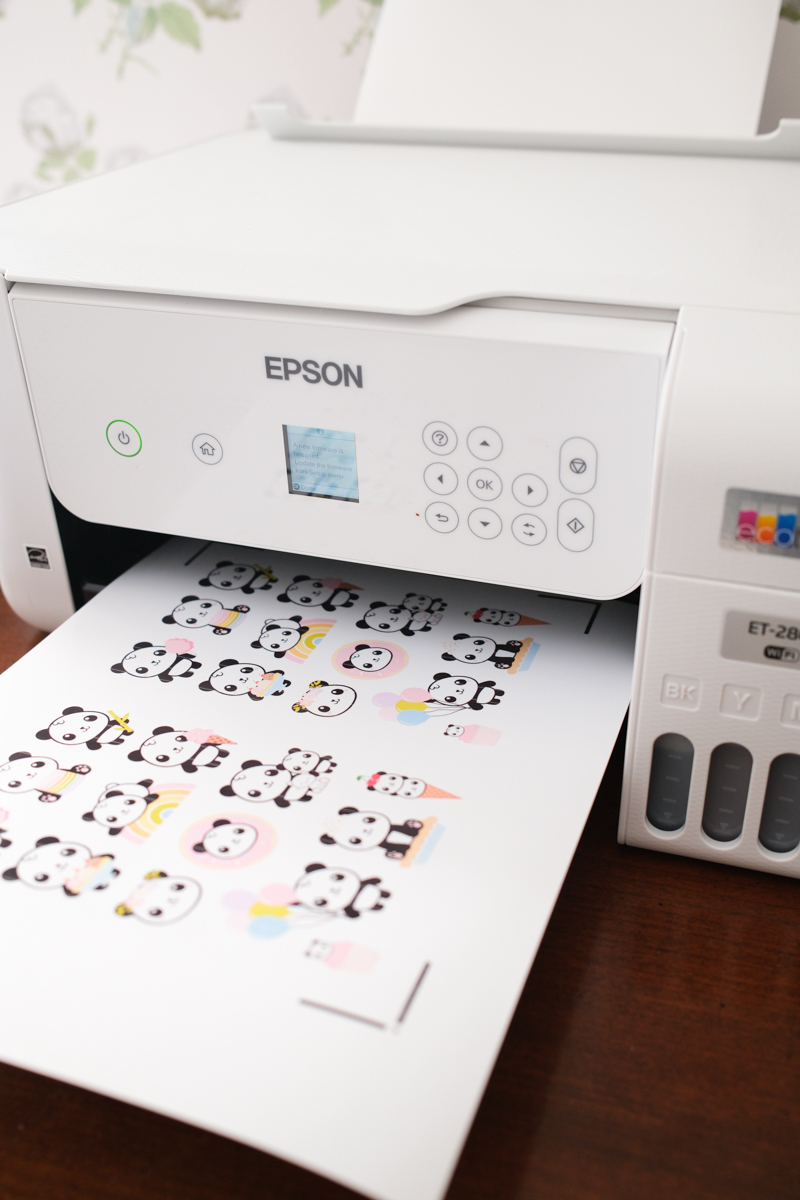
5. Make sure your printer is connected and select continue. Be sure to select the highest-quality printer settings and make sure the paper works with your printer type. I have also found it’s best to only place one sticker sheet into the printer at a time.
6. Click the send to printer button and print your stickers. But first, be sure to deselect add bleed and increase the die cut pressure.
7. Once your image has printed, verify the print quality and select done.
How to Make Stickers With a Cricut
Set Your Base Material
This step is really important, because it will determine how your stickers are cut. At first, I could not get a proper cut for kiss-cut stickers – my Cricut was cutting all the way through. So what did I do? I adjusted the settings for this paper. Here’s what you need to do.
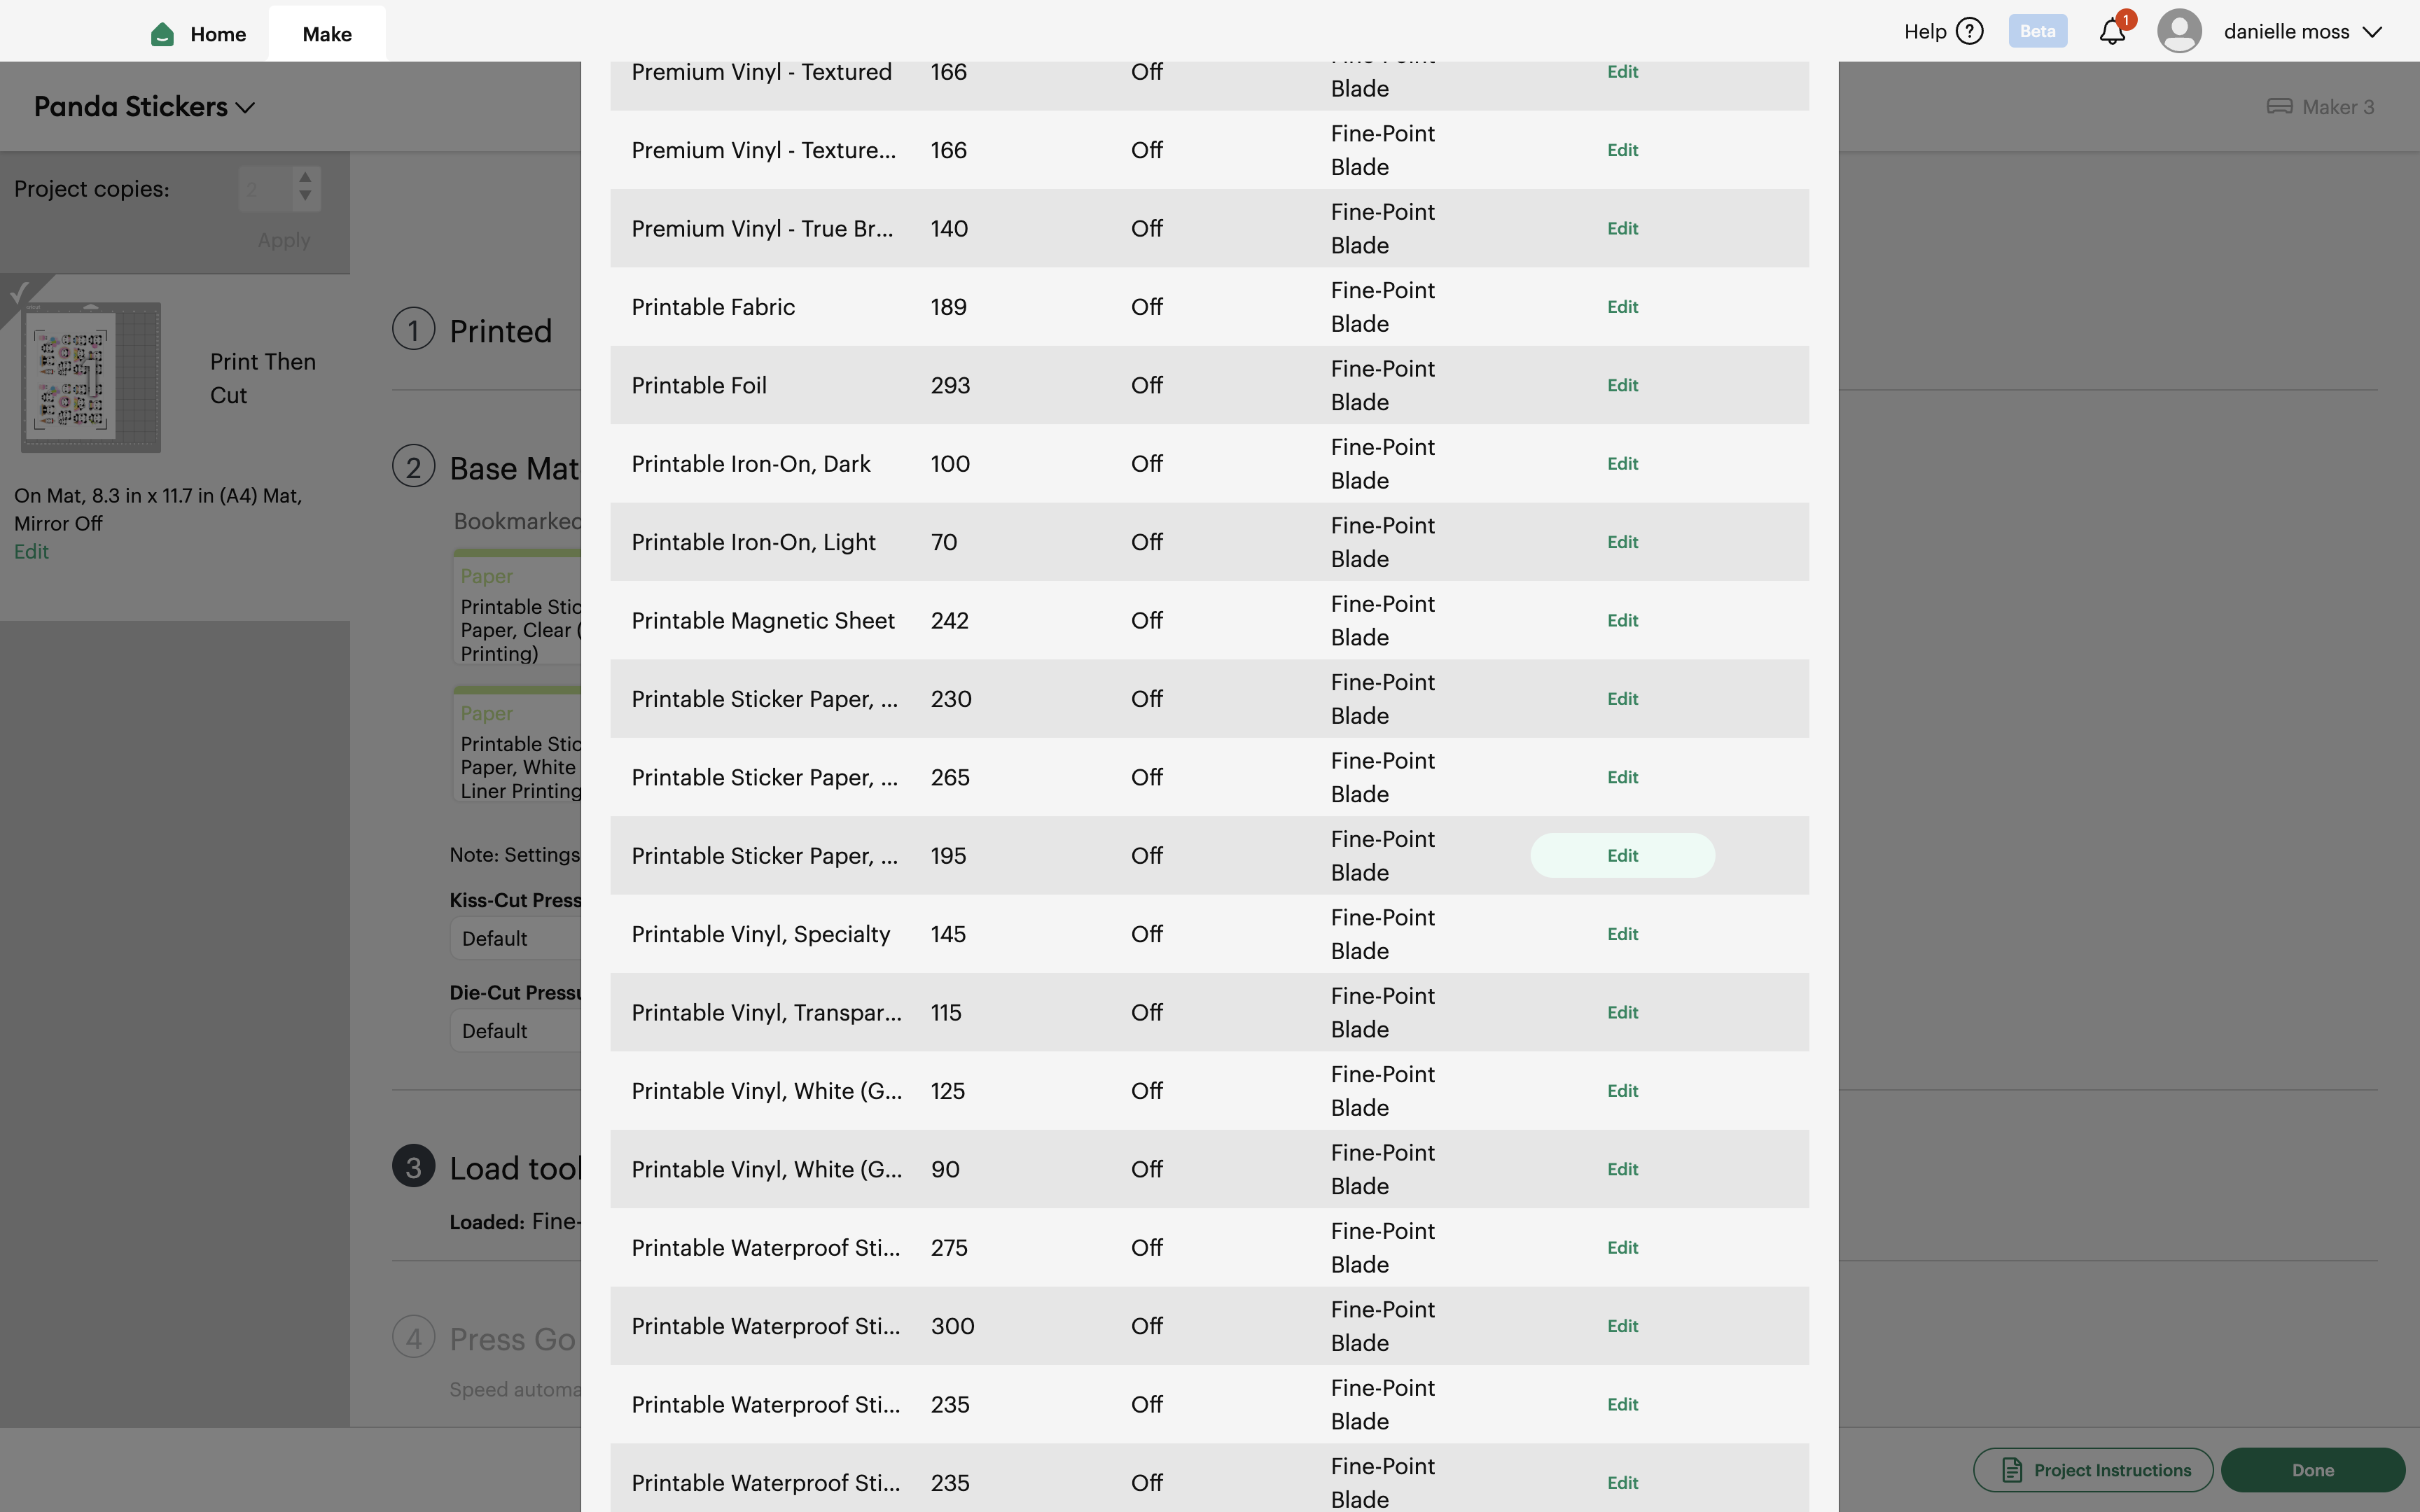
1. When setting your base material, select browse all materials.
2. Select Printable Sticker Paper, White (Green Liner Printing) and then select material settings at the bottom.
3. You’ll scroll down until you see Printable Sticker Paper, White (Green Liner Printing). Although you won’t actually see the liner color because the text cuts off, so just select the third one, and adjust to the following settings.

Cut Your Sticker Sheet
Now it’s time to cut your sticker sheet. Before you do this, if your Cricut near a wall, be sure to pull it out so there’s room for your mat to go through the machine. If it’s too close to the wall, it will hit the wall and possibly jam your machine.
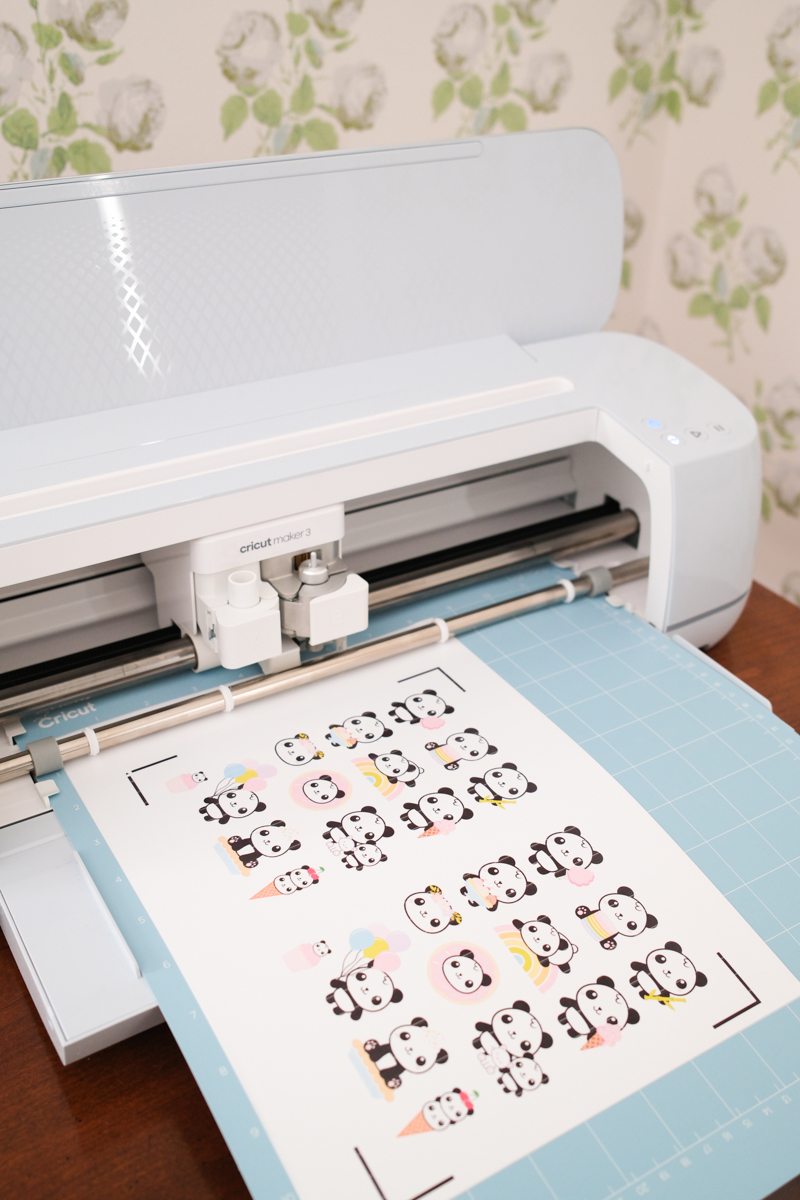
1. After making sure your Cricut is connected, place your printed sticker sheet on a Light Grip mat. You will see black registration marks around your image. Make sure the arrow next to the black lines is facing up toward the Cricut.
2. Select the cut option.
3. Feed your mat into the Cricut, and select the button with 2 arrows. The Cricut will scan the image, and once it’s ready, the Triangle button will flash.
4. Push the triangle button to begin the cut.
5. When the Cricut has finished cutting, the mat will be pushed out to the front, and the button with two arrows will flash. Push that button to release the mat.
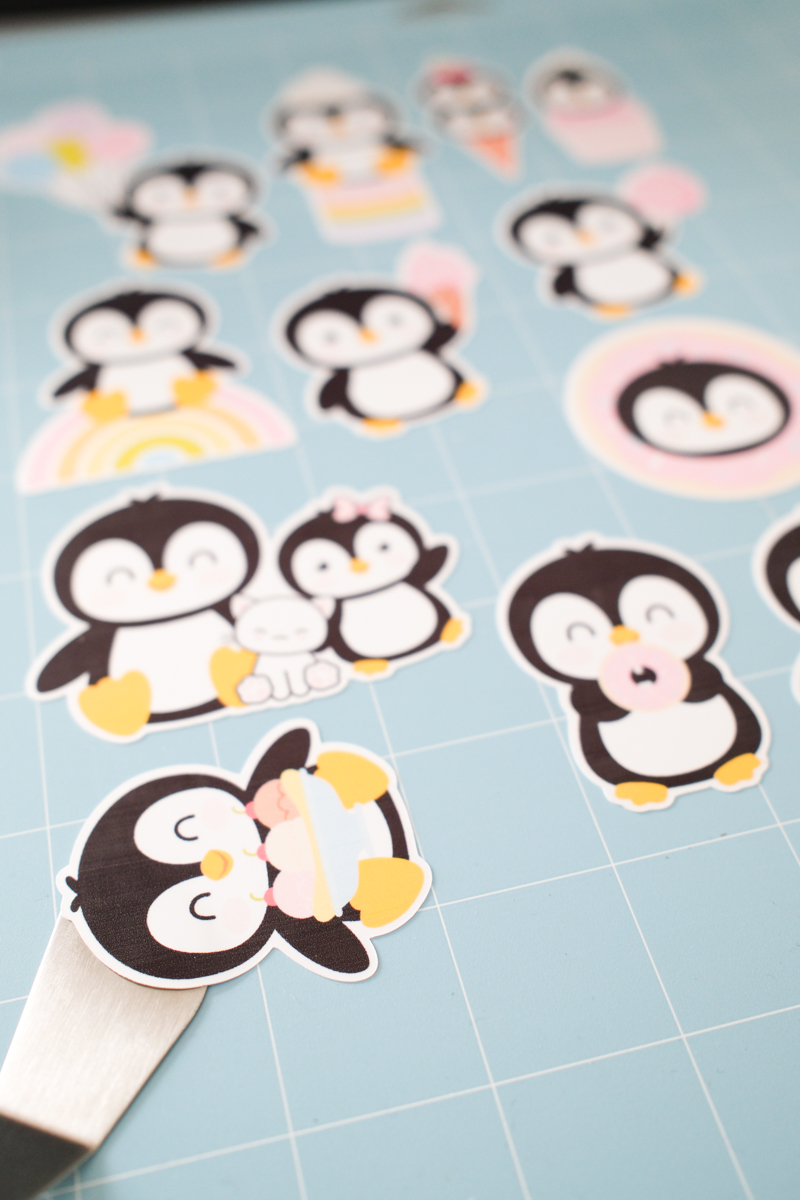
Peel Your Stickers off The Mat
This is the easiest (and most satisfying step).
1. First, grab a corner of the sticker paper, and simply peel away the sheet from the mat.
2. Grab a corner of the actual sticker sheet, and peel the mat away from the sheet. Pulling the mat helps keep the sticker sheet from bending.
This post contains affiliate links. If you purchase something using my links, I may earn a small commission at no cost to you.