Living
DIY: How to Cover a Cork Pin Board with Fabric
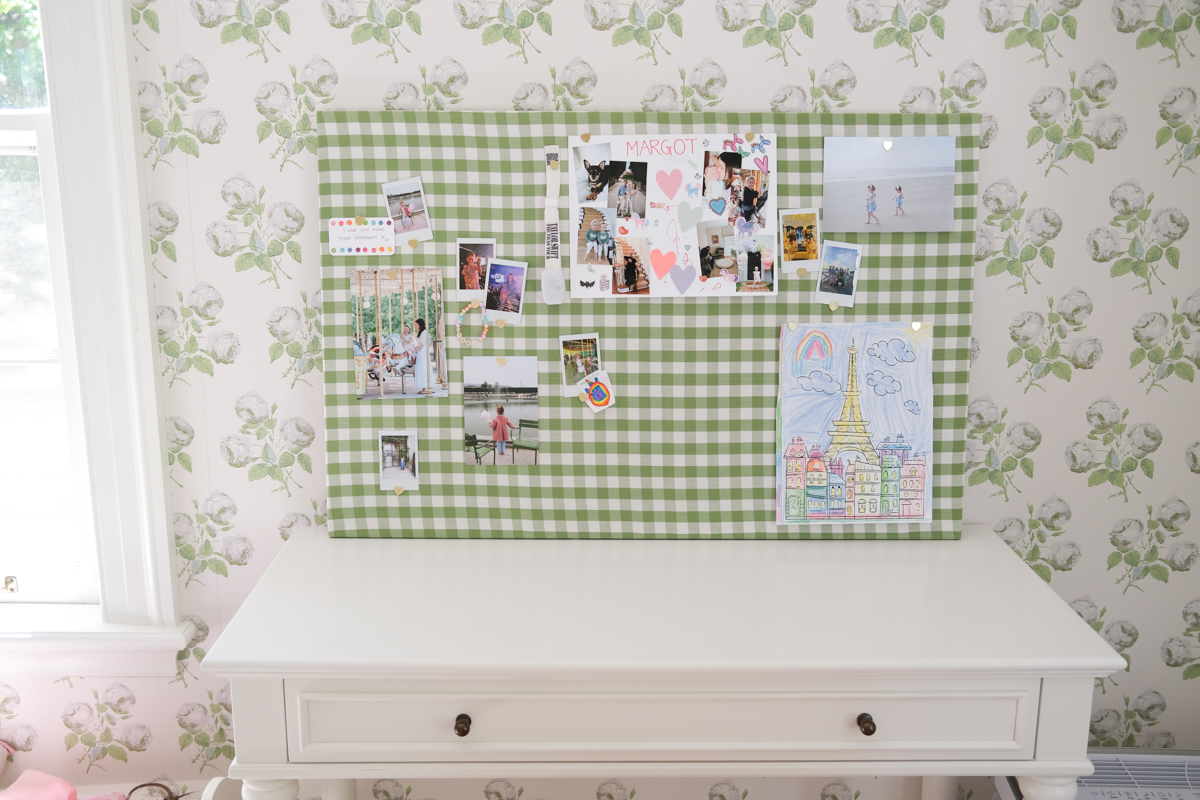
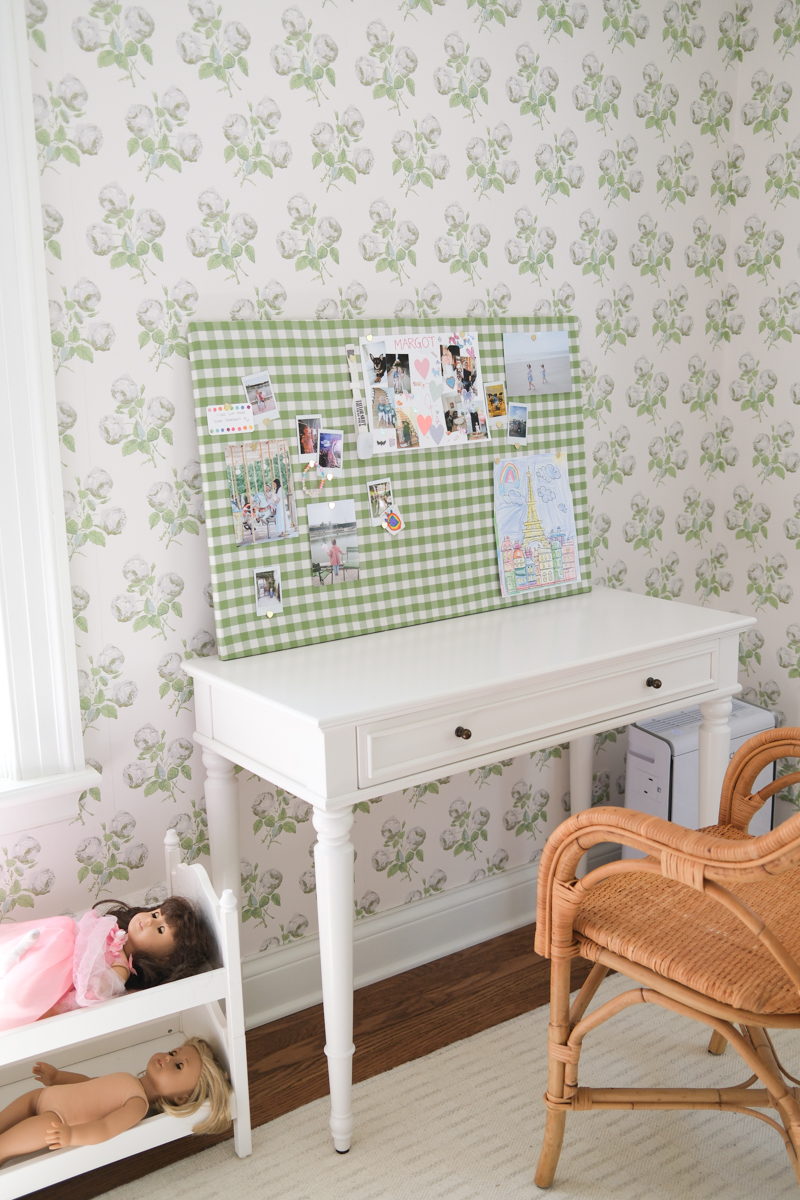
I’ve been working on my daughter’s bedroom and since she has a new desk, thought it would be fun to create some sort of pin board out of cork boards for photos and art. I found some cute, simple linen options, but wanted something a little more fun in her bedroom. So I messaged my upholsterer and was so happy to hear that he could make one for us. But it would cost $500. No, thank you. So I purchased a pin board with a hardwood frame for just under $12 and decided to cover it myself. This 30 minute project was so easy, and my daughter loves her new custom pin board.
DIY: How to Cover a Cork Pin Board with Fabric
Push pin boards are beautiful workspace solutions for those of us who like to have pretty inspiration around us. Who doesn’t love a mood board full of beautiful photos and images? They are the perfect workspace solution, too. A blank canvas to fill with the things that inspire you. They work in any type of spaces, from bedrooms to offices. I’ve seen gorgeous fabric bulletin boards online, but not in the right fabric, and I wanted the perfect board for her room. This ended up being the perfect choice for her room, and is a fun place for happy inspiration and memories.
I prefer cork bulletin boards to magnetic boards because the thought of a magnet falling off and my 1 year-old eating it made me a little anxious. And I wasn’t sure how fabric would work with magnetic bulletin boards, so cork board seemed like the best option. It couldn’t have been easier, or actually it could have have had I not chosen a gingham fabric (so many lines to keep straight!). But I’m so happy with how it turned out. See all the additional details below.
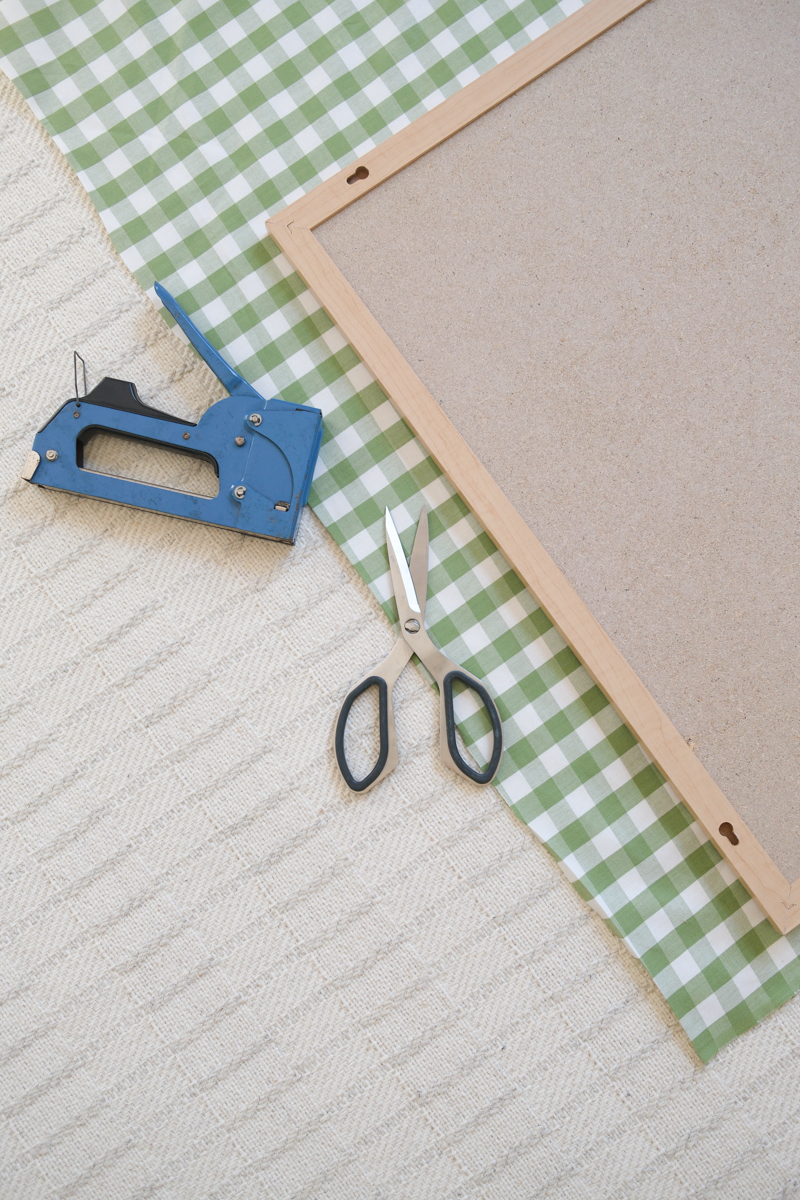
Materials Needed
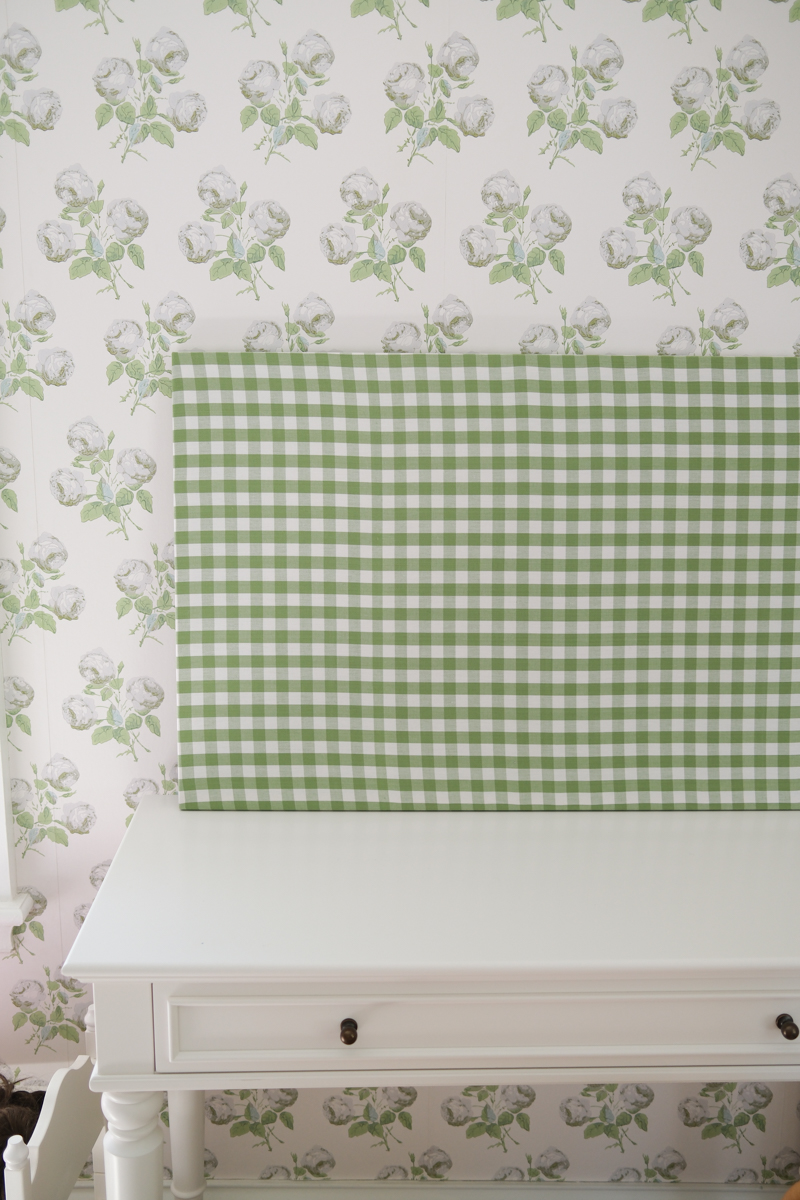
Cork board: Choose a cork board that’s the right size for your space. I purchased a 23″ x 35″ board for my daughter’s room for under $12! But you can buy framed or frameless pin boards. Frameless pinboards seemed like they might be ideal, but you can’t tell that there’s a frame on this board, and it was so cheap. I was a little worried that things wouldn’t line up perfectly because of the frame, but it was the perfect choice for this project. I looked into various cork board styles, but realized that a cheap board would do the trick, and it did.
Fabric: I purchased one yard of this fabric in leaf, and it was more than enough. You can choose linen or gorgeous upholstery fabrics that work well with the design of your room. Premium materials aren’t necessary, but I went with Schumacher fabric in the same color and style (but a smaller check) as my daughter’s headboard.
Staple gun: I used my MIL’s extremely old and slightly rusty staple gun, but this one has great reviews.
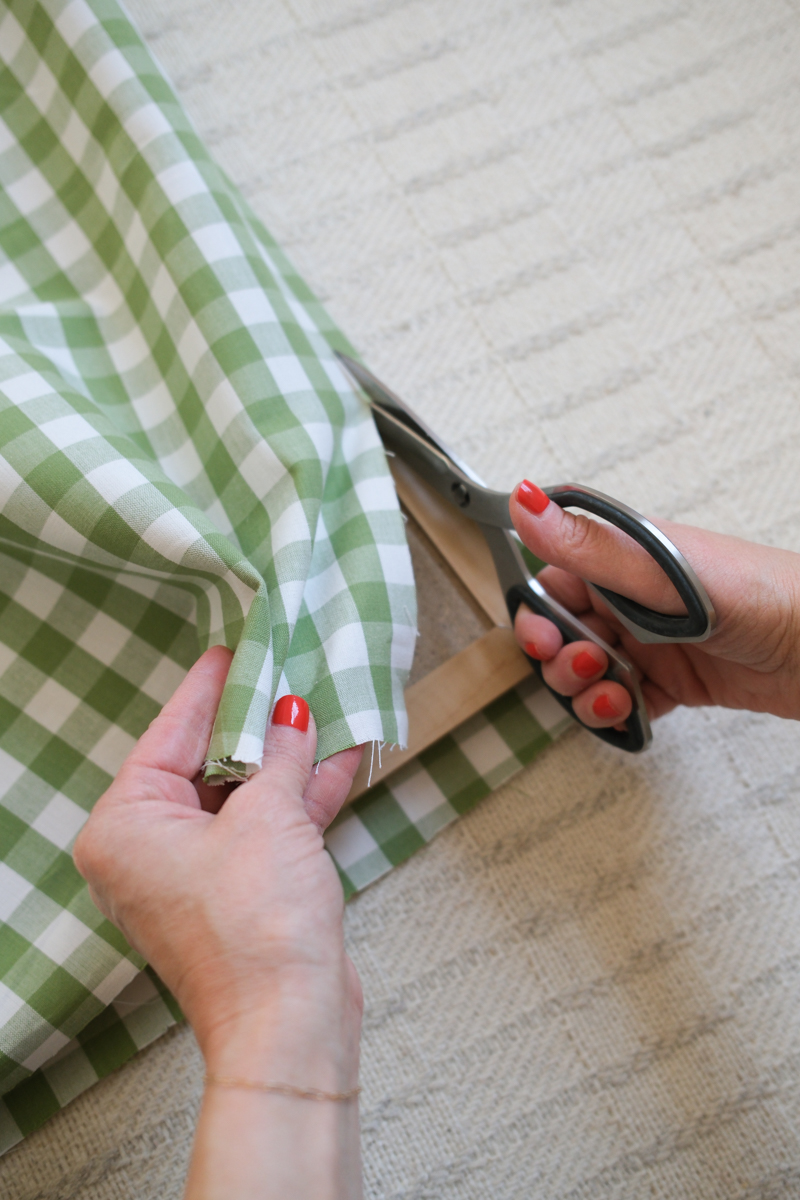
Scissors: You’re going to use these to cut the excess fabric. The ones I used are technically kitchen shears but they are incredible and cut fabric very easily.
Iron or steamer: Smooth out any wrinkles in the fabric.
Pins: You could find lots of different pins and start a unique pin collection. I went for easy and purchased these heart pins from Target.
Step-by-Step Instructions
Once you purchase your pin board and fabric, you’ll want to gather your supplies and lay everything out.
Prepare the Fabric
Lay the fabric flat and iron or steam out any wrinkles. This will ensure a smooth, flat finish before mounting it to the board. Position the fabric so it’s laid evenly on the board. If you want to make things as complicated as possible, choose a fabric with a grid so you have to line it up both horizontally and vertically.
Measure and Cut the Fabric
I actually laid the fabric out first and started stapling it before cutting the other two sides, but a normal person would line up the fabric with the edges of the board and leave an extra inch, and cut before starting to attach it.
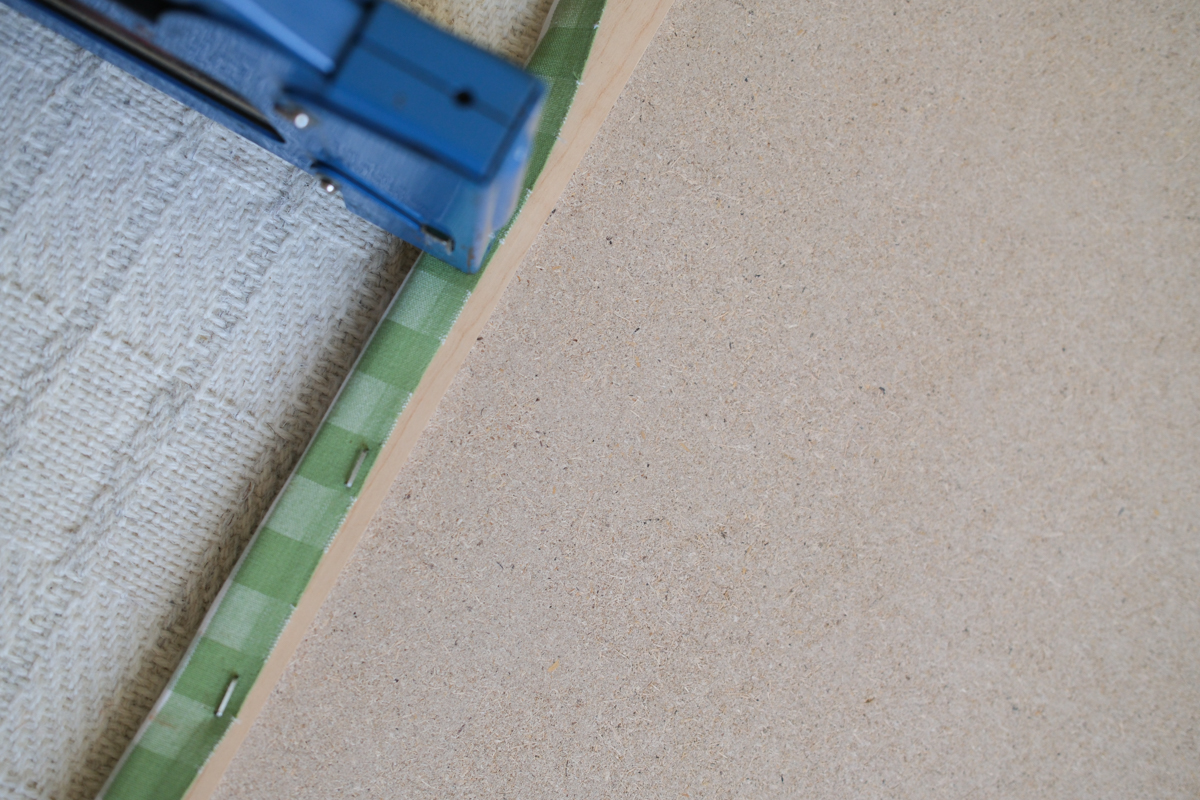
Staple the Fabric to the Board
Start to fold the fabric over the edges of the board and start stapling the fabric to the back of the frame. For the corners, fold the fabric neatly, as if wrapping a present, and staple securely. Be sure to cut around the hanging system on the back of the board.
Trim Excess Fabric
Once all sides are secured, trim any excess fabric, leaving enough to ensure the staples or glue hold the fabric in place.
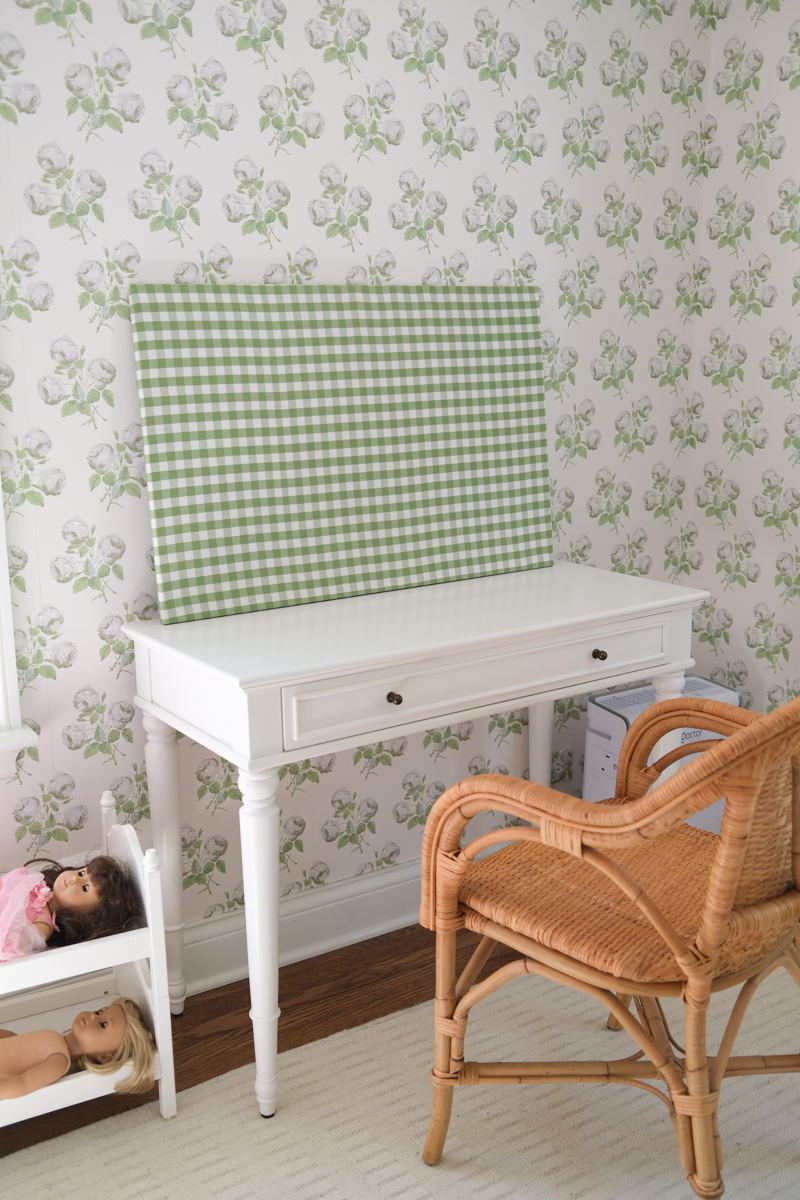
I haven’t mounted it yet because the room is wallpapered and I’m too scared to hang it up without my father in-law’s help. But I’m so happy with how it turned out!
This post contains affiliate links. If you purchase something using my links, I may earn a small commission at no cost to you.